

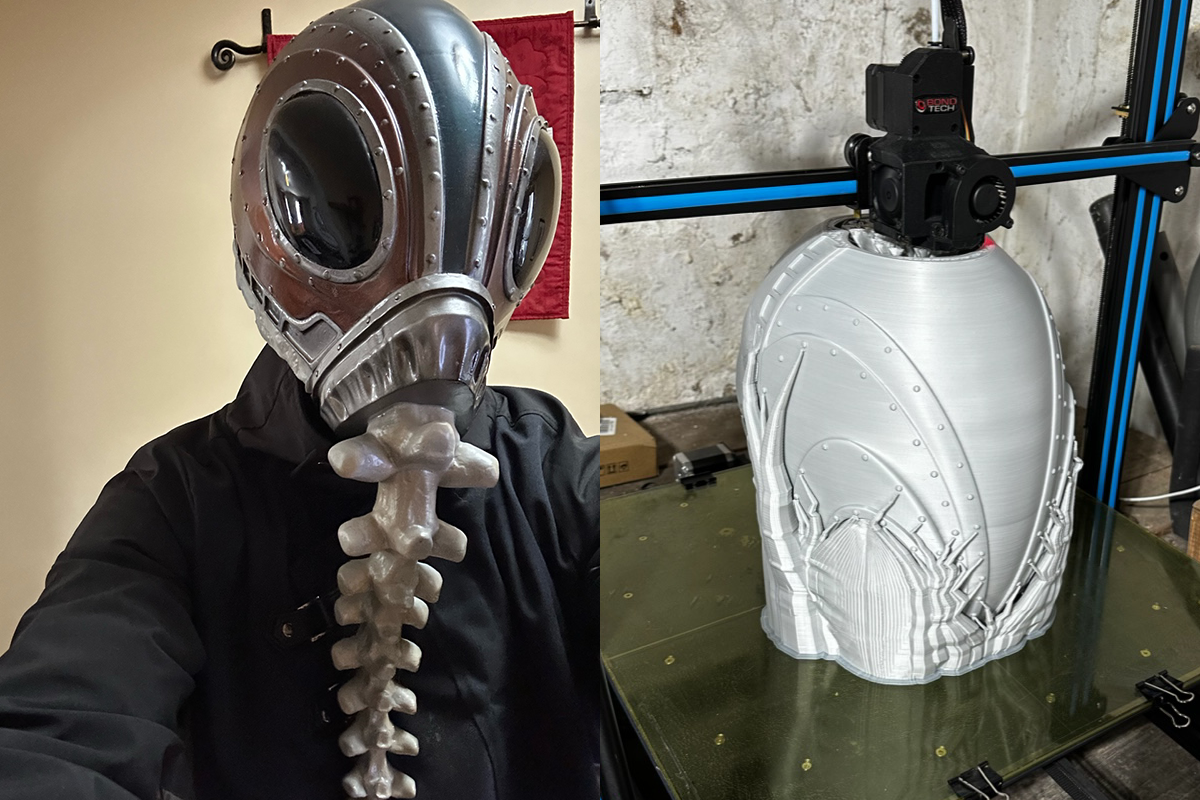
Our pleasant Kilted Mandalorian and “Serial Kilter”, Dan Simon, has finished it once more. This time, making a incredible Sandman Dream cosplay piece. The design for the Dream helmet (by the superior Marko Makaj) had three primary parts to be printed: the principle helmet, the nosepiece, and the backbone.

Dan shares, “The backbone mounts right into a recessed space on the nosepiece (affixed with an inordinate quantity of E-6000 glue to make sure that it’s not going wherever), and the nosepiece is joined to the helmet by three giant bolts (additionally 3D printed).”
Try Dan’s course of, his struggles, and his ideas on the creation of this new piece beneath in his personal phrases… which are sometimes entertaining sufficient on their very own.
Creating the 3D Printed Sandman Dream Cosplay Helm as Written by Dan

I began the entire course of by printing the principle Dream helmet (after all) — a whopping 11.5-day lengthy print job.
The 3D printer I used for this, the Creality CR10-S5, whereas enormous, will not be what you’d name “quick”…or “straightforward”….or “dependable.”
Seems that in a protracted print run, the CR10-S5 will slowly loosen the mounted bolts that lock the print mattress down. It additionally seems that when the mattress is free on the printer, the thermocouple that checks the mattress temperature begins getting a bit…erratic. When the thermocouple will get erratic sufficient in its readings, somewhat setting within the printer’s firmware kicks in and goes right into a panic (ending the print) because it thinks the mattress’s heating factor has gone rogue and goes to kill us all. It will inevitably occur within the final 10 hours or so of the 11.5-day print and trigger an inordinate quantity of swearing to happen.

Lesson discovered: aligning the helmet with the construct plate in an simply repeatable approach might help you overcome even essentially the most cussed of printer malfunctions. Utilizing the nearly-finished helmet as a information, I pulled up the slicing software program and sank the mannequin into the construct plate till it was as shut as I may deliver it to the purpose that the print reduce off. Slice, queue up the printer, and end the highest of the dome. Glued the entire thing collectively and breathed a sigh of aid (with just a bit extra swearing after I realized that my hand was superglued to the helmet…once more).

The rest of the items for this Sandman Dream cosplay helm had been printed **with out problem.
**OK, it is a lie. The heatbreak — the half that connects the heatsink to the heating factor — snapped when printing the backbone. Massive mess, a number of swearing, a number of cleanups, and a few new elements ordered by Amazon.
The absolutely assembled helmet was coated liberally in XTC-3D. It seems that coating something liberally in XTC-3D could cause some dripping because the epoxy dries. Extra swearing was concerned right here, although my coronary heart wasn’t actually in it. Nothing {that a} “little” sanding couldn’t repair, so operations moved on to masking…and portray…and extra masking (lather, rinse, repeat…wipe fingers on pants).

A observe for people who don’t like seeing their contemporary coat of paint peel off when eradicating masking tape: permit the paint to totally remedy earlier than making use of extra masking. In case you’re really paranoid (like yours really), spray all painted areas with a layer of clear coat earlier than masking — the clear coat will be sure that nothing peels off and protects your newly painted floor.

Whereas ready for the paint to dry, I began engaged on the lenses. A vacuum former makes the job tremendous easy, particularly since Marko was type sufficient to incorporate designs for the lens kinds for precisely this utility. The one downside I bumped into right here was that I don’t have a vacuum former. What I do have is an acrylic welding shied, a warmth gun, and what my spouse refers to as “blacksmith fingers” (I have a tendency to choose up unusual hobbies). Acrylic welding shields would seem to require a major quantity of warmth to change into pliable sufficient to press over the shape by hand. I like to recommend sporting greater than the leather-based gloves I selected if you happen to don’t wish to poach your self an excessive amount of.

As luck would have it, a mix of metallic silver, black, phthalo blue, and color-shifting acrylics give a reasonably good approximation of a “midnight sky.”
Study Extra About 3D Printing and Cosplay
In case you occurred to overlook the very first episode of our podcast and video collection 3D Universe Untethered and wish to try how Dan made his 3D printed Kilted Mandalorian armor in addition to hear how fellow cosplayer Dave Lysen teamed up with 3D printed e-NABLE Prosthetics co-inventor, Ivan Owen and 3D Universe’s Jeremy Simon and Dan Pelland to create a Okay-2SO Cosplay venture with purposeful 3D printed mechanical fingers, try the video above!
If that doesn’t fulfill your interior cosplay nerd, try our video of our interview with Volpin Props and get your self impressed. You may watch that episode within the video beneath!
As you’ll be able to see, there are a number of methods during which you should utilize 3D printing to make killer cosplay and costume designs and props. It’s only a matter of deciding which 3D printer and filament you need and making an attempt to determine which factor you wish to make first, particularly whenever you understand you wish to “MAKE ALL THE THINGS!”
Study Extra About 3D Printers and Vacuum Formers

Need to know extra in regards to the various kinds of 3D printers which are accessible, which of them can be utilized to construct giant items for costuming, and what supplies work finest?
Curious how you should utilize a desktop vacuum former just like the Mayku FormBox or the Multiplier to make prototypes and completed items on your cosplay costumes?
Try our 3D printers, 3D forming machines, and our supplies pages, or be happy to e-mail us at information@3duniverse.org!