

If you wish to discover ways to add ending touches to your merchandise post-production earlier than delivery to your clients or rework your individual 3D printed designs to a extra vivacious colour you are able to do so by following a couple of easy steps. On this tutorial, Steven and Jeremy Gonzalez of The Tremendous Maker Bros display the best way to paint eyeglass frames printed in Multi Jet Fusion Plastic PA12 in a number of colours, a course of that may be utilized to many different tasks of the identical 3D printed materials.

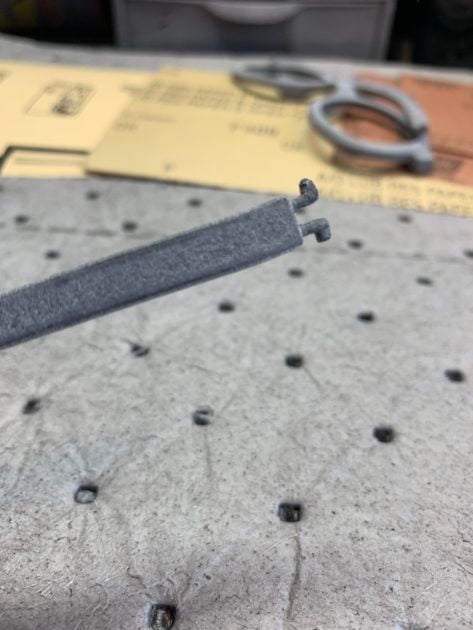
3D printed eyeglass frames in MJF PA12, 220/400/600 grit sandpaper (Photograph by The Tremendous Maker Bros)

Primers and paints (Photograph by The Tremendous Maker Bros)
Here’s what you have to:
- 3D mannequin printed in Multi Jet Fusion Plastic PA12 (additionally relevant for Versatile Plastic)
- 220 grit, 400 grit and 600 grit sandpaper
- Spray paint primer
- Spray paint in your required colour(s)
- Clear coat matte or gloss spray paint
- Reusable drop cloths or newspaper to guard your work space from paint
- Extremely Beneficial: A respirator with replaceable filters won’t solely shield you from spray paint fumes however will final you thru many extra future paint tasks.
After you have these supplies you might be able to get began. Comply with the steps under and take a look at this video to see every step in motion.
Step 1:
Put together your workspace by inserting newspaper or a drop fabric over the world to cowl any furnishings or ground house in vary of your spray portray sample. Shield sufficient house to spray from totally different angles.
Step 2:
Put in your respirator. Spray paint fumes are poisonous and sanding generates mud particles which are harmful to inhale, so be sure to sand and spray in a properly ventilated space and put on your respirator.
Step 3:
3D printed eyeglass frames, sanded (Photograph by The Tremendous Maker Bros)
Begin by sanding the glasses items to clean out their surfaces. This can even assist the paint adhere to the plastic. Makerbro Tip: The perfect sandpaper to make use of is moist/dry or waterproof paper as a result of getting the paper moist helps cool the plastic whereas sanding in addition to retains small dislodged plastic particles below management. Waterproof sandpaper is black as a substitute of tan or beige.
Start with a rougher, 220 grit sandpaper to take away any cumbersome texture after which transfer on to 400 grit and 600 grit to buff the floor clean. The decrease the quantity, the rougher the paper is. Remember to rinse and dry the items to take away free particles.
Makerbro Tip: To present your sandpaper extra longevity, apply spray adhesive to the again of your quarter sandpaper sheet and fold it over to make an additional thick one-eighth sheet. This will provide you with the flexibility to make use of extra strain with out tearing a gap within the paper.
Step 4:
Prime the frames utilizing a sprig primer just like the Dupli colour filler primer. Spray the glasses utilizing a sweeping movement, protecting the spray can at a distance of about 6 to 12 inches. Spraying too intently will coat the thing in an excessive amount of paint and trigger dripping and even trigger the coat to crack when dry. Be certain that all seen floor space is roofed and let the items dry earlier than spraying the opposite facet.
Makerbro Tip: Spray paint takes about half-hour to dry to the touch however wait between 1 to 2 hours to deal with it. It will likely be absolutely dry after 24 hours.
Step 5:
As soon as the glasses are primed, sand the surfaces as soon as extra utilizing the 600 grit paper to realize most smoothness and wipe away any ensuing mud.
Step 6:

3D printed eyeglass frames, painted (Photograph by The Tremendous Maker Bros)

3D printed eyeglass frames, painted (Photograph by The Tremendous Maker Bros)
Utilizing the identical spray portray technique as with the primer, spray every bit within the colour of your alternative and let absolutely dry for twenty-four hours.
Makerbro Tip: Wish to use a couple of colour on the identical piece? Use masking tape to cowl components of your venture you need in a unique colour. As soon as the primary colour dries, cowl that portion and paint the remaining.
Step 7:
As soon as the glasses have had 24 hours to completely dry, it’s time to seal up the paint with a topcoat. Utilizing the identical spray portray technique, apply two layers of topcoat, leaving 1 to 2 hours of drying time in between. This helps shield the paint and enhances the shine or matte end desired. It additionally offers a buffer between paint and pores and skin contact.
Step 8:

3D printed eyeglass frames, painted in blue and brown (Photograph by The Tremendous Maker Bros)

3D printed eyeglass frames, painted in inexperienced and crimson (Photograph by The Tremendous Maker Bros)
Now assemble the items and also you’ve obtained a model new pair of glasses! You’ll be able to have a pair in each colour.
Try The Tremendous Maker Bros on Instagram (the place they’ll be posting extra pictures and movies) and YouTube for extra enjoyable 3D printed tasks.
Extra from the Materials of the Month Collection: PA12
Half One: Materials Overview
Half Two: Materials Comparability: Nylon Plastics
Half Three: Enterprise Instance: PA12 used within the digital actuality business