

Learn how to Make a Discord Server Public – Simple Steps
- Proper-click in your server’s icon
- Open “Server Settings.”
- Click on “Allow Group”
- Full 3 steps to allow group
- Apply for Discovery
Discord has emerged as a strong communication platform for constructing on-line communities, constructing connections, and enabling seamless communication amongst hundreds of thousands of customers. Whereas making a Discord server, many server house owners face the problem of constructing their server extra seen and accessible to the general public. One efficient technique to obtain that is by making your Discord server public, permitting it to be found by customers trying to find communities of curiosity. So, whether or not you’re a gaming fanatic, a hobbyist, or an expert seeking to community, making your Discord server public can unlock a world of alternatives. So, let’s dive in and uncover how one can take your server to new heights by harnessing the ability of public publicity.
What’s Discord server privateness?
Discord server privateness refers back to the stage of management and visibility you’ve gotten over your server’s content material, members, and total accessibility. Discord provides varied privateness settings that enable server house owners to customise their server’s privateness in response to their preferences and desires. These settings decide who can be a part of the server, what content material is seen, and the way a lot management server members have over their very own privateness throughout the server.
Make Discord Server Public – Steps
Step 1: Open Discord App
To launch the Discord utility in your desktop, find the Discord icon and provides it a click on.
In the event you don’t have the Discord app put in, you’ll be able to merely entry Discord instantly by means of any internet browser in your desktop.

Click on Discord Icon to open Discord App
Step 2: Proper-click on the server icon to open the server menu
Carry out a right-click to entry a number of choices for the server you wish to make public.
Choose Server > Proper Click on on Server Icon
Step 3: Choose Server settings from the server menu
After you have right-clicked on the server icon, you’ll be able to choose “Server Settings” from the menu that seems.
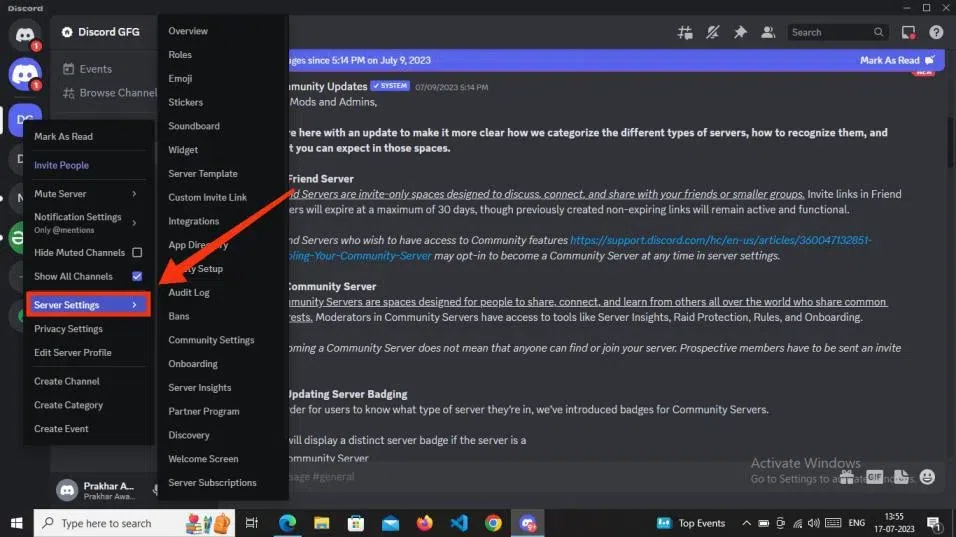
Proper Click on on Server Icon > Server Menu > Choose Server Settings
Step 4: Go to the ‘Allow Group’ tab
In the event you’re able to convert your server right into a Group Server, navigate to allow group possibility and full the enabling course of. Now now you can designate your server as a Group Server.
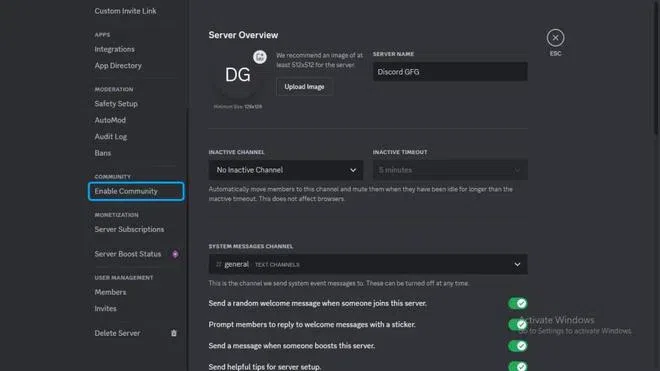
Server Settings > Allow Group
Step 5: Choose “Get Began” & Full three steps to arrange your group
With the intention to allow the group in your Discord server, you’re required to have the next steps and settings enabled with a purpose to guarantee security in the neighborhood. These steps are named “Affirm Security checks, Add & Affirm particulars in Organising the fundamentals, and Ending touches”.
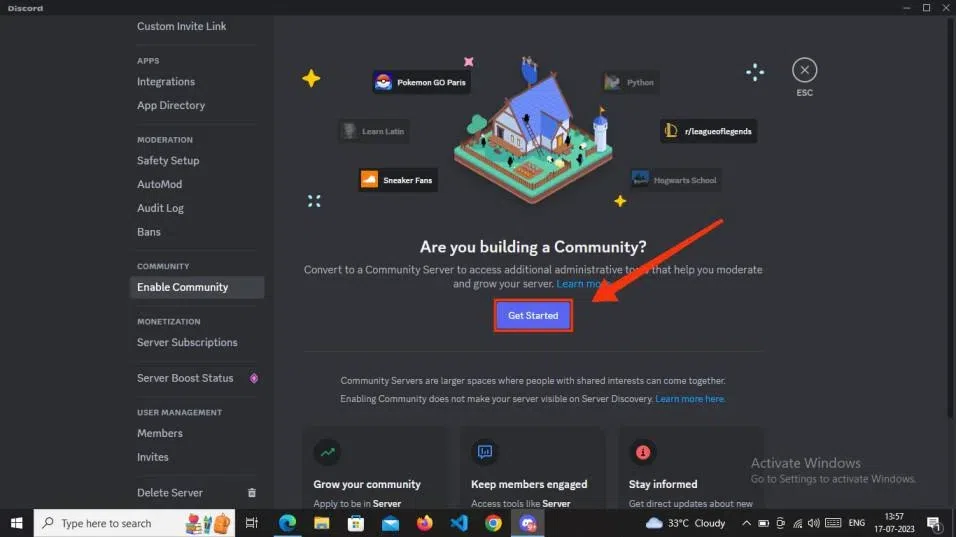
Allow Group > Get Began > Create a Group
A: Affirm Security checks
On this step, a verified e mail is important, and all members’ media ought to endure scanning. After enabling each the choice click on the ‘Subsequent’ button.

Create a Group > Add verified E-mail > Allow Scan Media content material from all members > Subsequent
B: Add & Affirm particulars in ‘Organising the fundamentals’
On this step, proceed so as to add the required affirmation particulars and punctiliously overview all the foundations and laws of the channel.
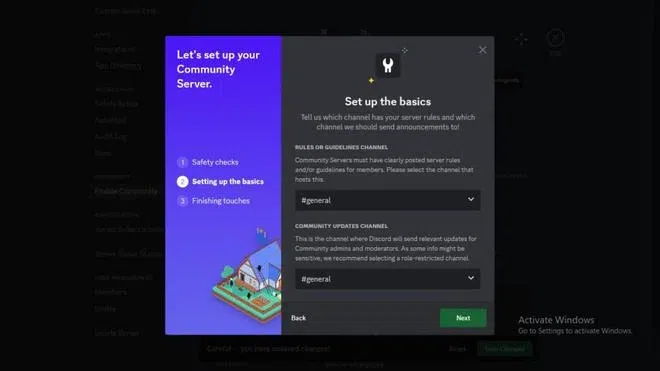
Add particulars in Organising the fundamentals > Subsequent
Add particulars in Organising the fundamentals > Subsequent
C: End the third step “Ending touches”
Within the closing step, guarantee to verify the protection checks obtainable within the “Ending Touches” part. This contains agreeing to and understanding the foundations for establishing a group server. After you have accomplished these steps, click on the “End Setup” button to finalize the method.
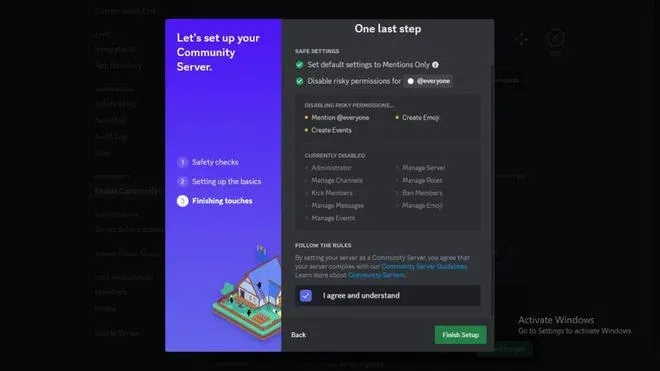
Full Ending Touches > Agree & Perceive > End Setup
Step 6: Allow “Discovery”
When you’ve activated the “Group” characteristic in your server, merely navigate to the left sidebar. There, you’ll discover a number of new tabs, similar to overview, server insights, companion program, and extra, all positioned below the “Group” header. Amongst these tabs, you’ll additionally discover one labeled “Discovery.” By enabling Discovery, your server shall be listed on the “Discover Public Servers” tab, making it simpler for folks to search out your server by means of search. To activate discovery, merely click on on the “Allow Discovery” possibility. Nonetheless, it’s essential to satisfy the minimal necessities earlier than you’ll be able to allow discovery in your server.
Be aware: It’s necessary to notice that when you’re utilizing Discord on a cell machine, you gained’t have the ability to see this tab, because it’s not obtainable on the cell model. Nonetheless, on the desktop model, you’ll be able to choose the “Discovery” tab to entry the invention characteristic.
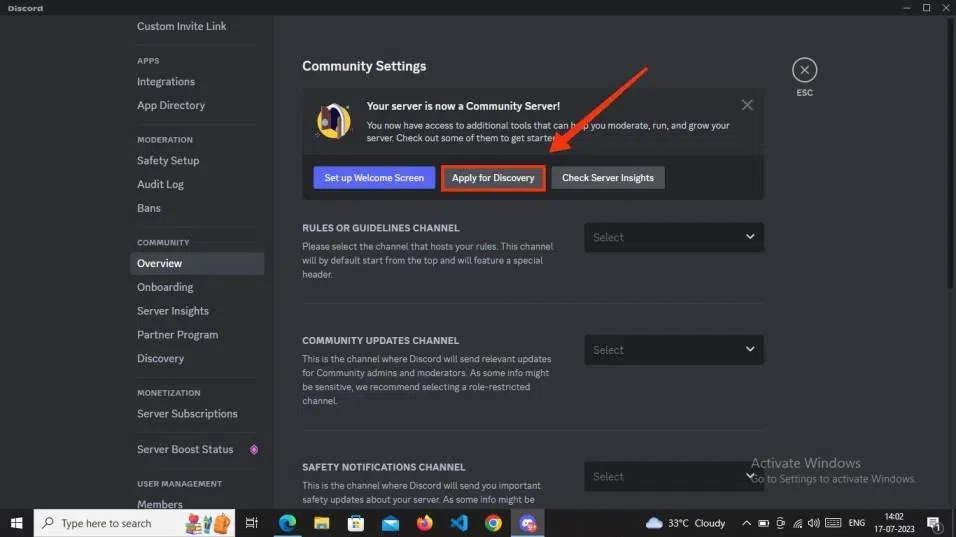
Group Setting > Apply for Discovery
Minimal necessities to allow discovery in your server:
- Enabling security necessities for a secure surroundings.
- The server will need to have not less than 1,000 members to qualify. (Earlier it was 7000 members)
- Servers should be not less than 8 weeks outdated to be in Discovery.
- Servers should meet sure exercise necessities to be in Discovery.
- Your server title, description, and channel title look clear!
- Allow the 2FA Requirement For Moderation Setting
Conclusion
Discovering public Discord servers can typically be difficult, however web sites like high.gg and disboard.org come to the rescue. These platforms present a handy technique to seek for Discord servers primarily based on their names, classes, and different standards. In case your server doesn’t meet the minimal necessities for enabling the invention characteristic, you’ve gotten the choice so as to add your server to those web sites. By doing so, your server turns into publicly accessible, permitting anybody to find and be a part of it. This strategy reduces the necessity for extreme self-promotion of your Discord server hyperlink, as customers can discover and be a part of your server organically by means of these devoted platforms.
Final Up to date :
18 Jul, 2023
Like Article
Save Article