

How To Filter Emails In Hotmail Utilizing Guidelines- Fast Steps
- Choose a Sender message from Emails.
- Proper Click on on that e-mail and go to Guidelines Possibility > choose Create Guidelines.
- Choose a Folder right here or create a New Folder to maneuver filtered messages.
- Click on Okay.
Managing a busy inbox is usually a problem, however worry not, as Outlook previously often called Hotmail provides a spread of highly effective filtering choices that will help you keep organized and centered. Whether or not you wish to routinely kind emails from particular senders into designated folders or arrange guidelines for particular e-mail situations, this tutorial will stroll you thru the method step-by-step. By the top, you’ll have the ability to grasp your e-mail stream and make sure that essential messages don’t get misplaced amidst the litter. Let’s dive in and uncover easy methods to benefit from Outlook’s e-mail filtering capabilities!
Be aware: This Article may be informative for Outlook Microsoft 365 Outlook 2021 Outlook 2019 Outlook 2016 Outlook 2013 Outlook 2010 Customers.
Filter Emails in Outlook utilizing Constructed-in Filters
Studying easy methods to filter emails on Hotmail is now a chunk of cake. Customers additionally discover default e-mail filters offered for simpler segregation of incoming emails. Yow will discover these filters and kind emails in your Hotmail Inbox by following this course of.
Step 1. Open Outlook.com
Log In or Open your Outlook on Desktop or Internet App.
Log in to Outlook.com
Step 2: Click on on Filter E-mail Icon
Please proceed to the highest right-hand aspect of the house panel the place you’ll discover the Filter icon, after which proceed to click on on it.
Click on on Residence > Navigate to Filter E-mail Icon > Choose Icon
Step 3: Select One Filter Possibility
When you click on on the filter icon, a dropdown menu might be displayed, presenting the default inbuilt filter record. From there, select the particular filter you need to view all emails associated to it, after which proceed with viewing all of the message in keeping with the chosen filter.
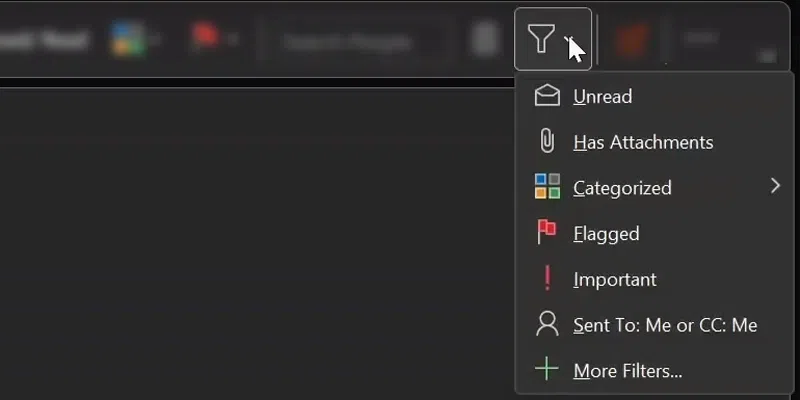
Click on on Filter Icon > Select A Filter
How To Filter Emails In Outlook Utilizing Guidelines
Outlook, previously often called Hotmail, provides numerous options, together with guidelines that can help you filter your emails and routinely redirect them to particular folders. Now, let’s discover how one can make the most of guidelines to filter all of your incoming emails to a selected folder.
Filter Emails in Outlook by Sender
Step 1. Create A Folder
Go to the highest of the menu and click on on “Folder Menu,” then select “New Folder” and “sort a reputation” of the folder. As soon as the folder is created, it will likely be seen on the left-hand aspect among the many e-mail folder choices.
Be aware: Be at liberty to call it in keeping with your wants and in a method which you could simply keep in mind it.
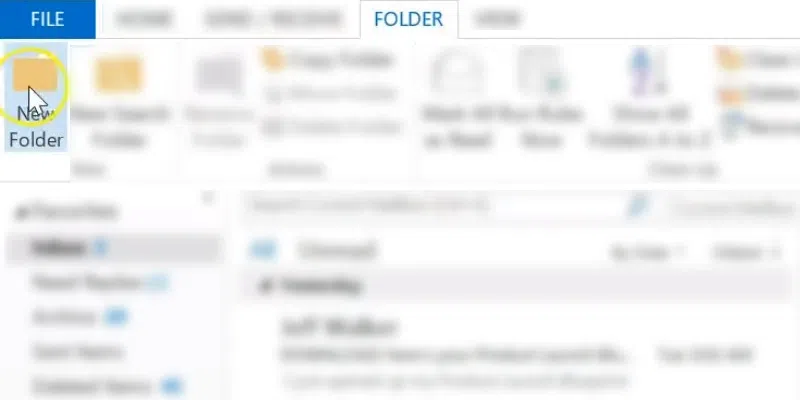
Navigate to the High Menu > Folder > Choose New Folder
Step 2. Choose a Sender from Emails
Now, select a sender out of your emails for whom you wish to arrange automated e-mail forwarding to the folder you’ve simply created.
Step 3: Choose Guidelines
After you could have selected the sender’s title, merely right-click on the e-mail ship by that exact sender and select “Guidelines” from the choices. Then, choose “At all times Transfer Messages from: Sender Title.”
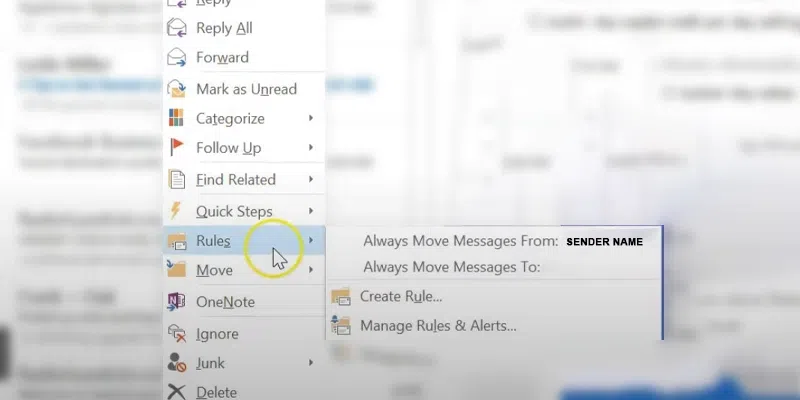
Choose the Sender E-mail > Proper Click on on E-mail > Choose Guidelines > Choose At all times transfer message from : Sender Title
Step 4: Choose the Created Folder
After deciding on the above rule, a window will pop up, asking the place you wish to transfer the emails. Now, select the newly created folder and press Okay.
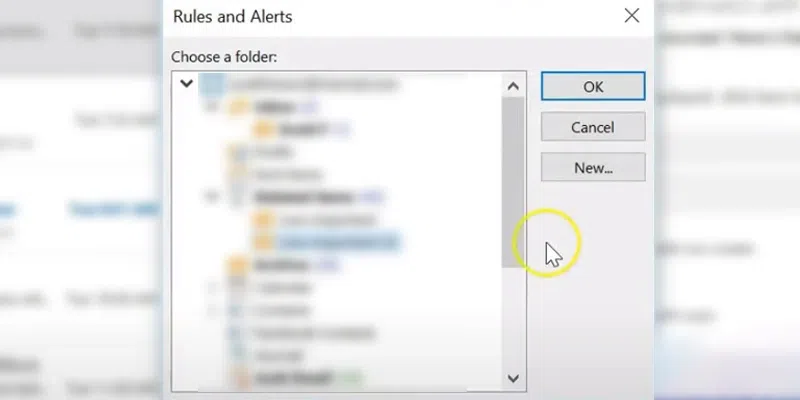
Choose the Newly Created Folder > Press Okay
Create Guidelines in Outlook for Particular Emails
Step 1: Choose a Sender
Choose a sender out of your emails for whom you want to create a rule.
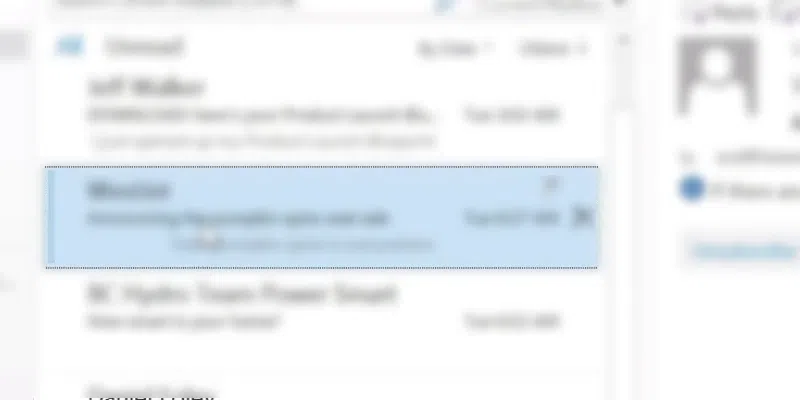
Select a Sender out of your emails
Step 2: Create Rule
When you’ve chosen a sender, merely right-click on the e-mail, and from the appeared choices, choose “Guidelines,” then select “Create Rule.”
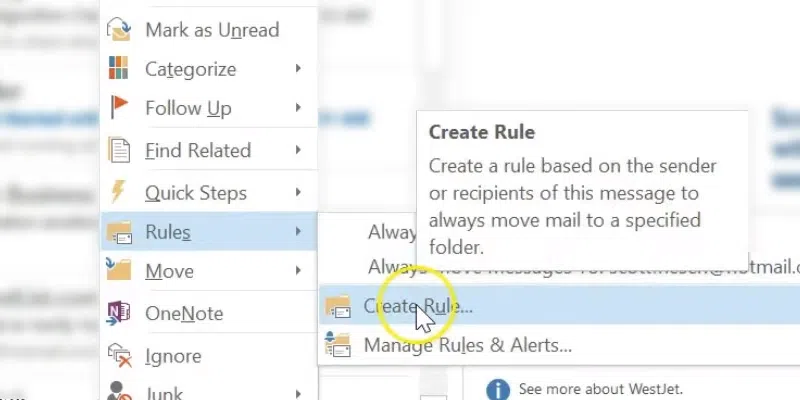
Select a Sender > Proper Click on on Sender E-mail > Guidelines > Choose Create Rule
Step 3: Select Circumstances and Allow Choices
If you click on on “Create Rule,” a brand new pop-up will seem, prompting you to set the situations. Please comply with the steps beneath to configure the situations:
“After I get e-mail with all the chosen situations”
Allow Topic Comprises and Sort the Key phrase that you just wish to filter out of your emails. The key phrase must be generic within the e-mail topic.
“Do the next”
Allow Transfer the merchandise to folder > Choose Folder the place you wish to transfer the emails.
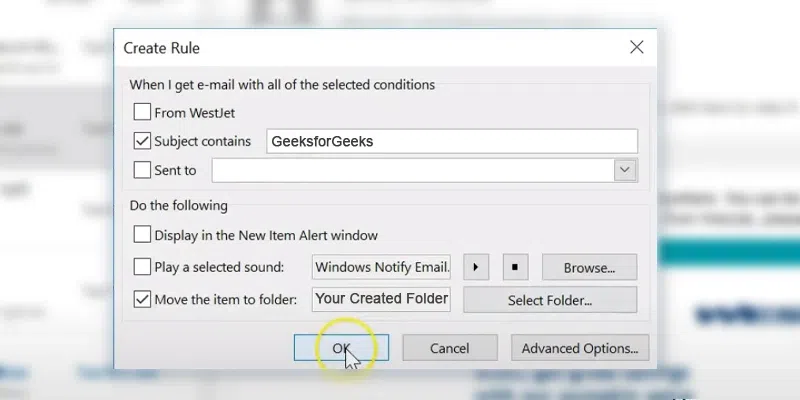
Create Rule > Allow Topic Comprises > Sort Key phrase > Allow Transfer the merchandise to Folder > Choose Folder > Choose Okay
Step 4: Choose Okay and Run the Rule
Now whenever you set all of the situations and press okay, a pop up will seem which can ask your permission to run the rule. Allow the Run the Rule choice and Press Okay.

Choose Okay > Allow Run the Rule > Click on Okay
Change Junk E-mail Settings in Outlook
Spam emails may be fairly annoying, however Hotmail’s spam filter ship most of them to the Junk E-mail folder. Nonetheless, in the event you discover that Outlook is both not catching sufficient spam or marking too many common messages as spam, you could have the choice to regulate the e-mail safety degree. By doing this, you’ll be able to specify which messages Outlook ought to block or permit, providing you with extra management over your e-mail filtering.
Step 1: Navigate to Junk E-mail folder
Step 2: Choose an E-mail
Step 3: Proper Click on high View all Choices
Step 4: Choose Report > Choose Not Junk
Be aware: You’re then requested to verify that you just wish to transfer the message to your Inbox. You even have the choice to specify that each one future emails from that handle won’t be marked as junk.
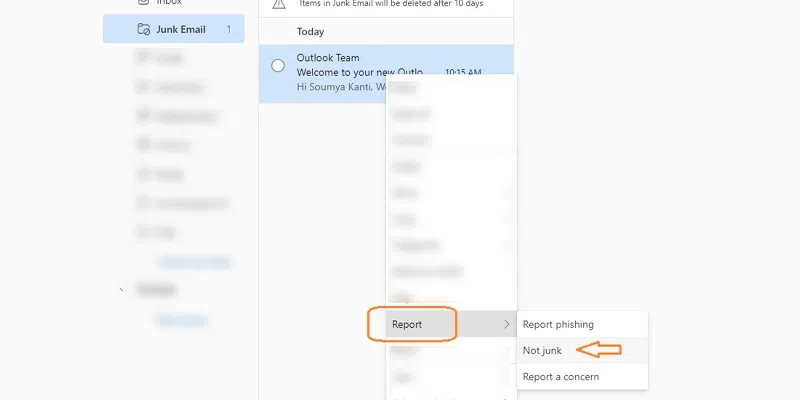
Choose Junk E-mail > Proper Click on on Chosen E-mail > Report > Not Junk
Conclusion
Managing an overflowing inbox may be overwhelming, however with Hotmail’s highly effective filtering options, customers can keep organized and prioritize essential messages successfully. The above article covers step-by-step directions on creating guidelines to routinely filter emails from particular senders into designated folders, guaranteeing a clutter-free inbox. By following the outlined steps, customers can effectively handle their inbox and make sure that essential communications are promptly attended to whereas maintaining spam at bay.
FAQs
How do I make emails go to a particular Folder in Outlook?
To simply create a rule for transferring all emails from a selected sender or a bunch of senders to a particular folder, comply with these steps: Proper-click on a message in your message record that you just want to create a rule for, then choose “Create rule.” Subsequent, select the folder the place you need all messages from that sender or set of senders to be routinely moved, and at last, click on on “OK.”
How do I kind and filter emails in Outlook?
In Outlook, you’ll be able to kind by the title of the sender or the recipient, the date of the e-mail message, its dimension, and different choices. Choose Filter on the high of your inbox. Beneath Type by, select any choice you favor to kind your e-mail.
Final Up to date :
27 Jul, 2023
Like Article
Save Article