Loop is Microsoft’s newest collaboration platform for organizations utilizing Microsoft 365 and Azure. The platform is in preview and will be activated with an advanced process.

Microsoft Loop is the corporate’s newest collaboration platform for organizations utilizing Azure and Microsoft 365. When it’s launched to the general public, organizations will have the ability to deploy the platform company-wide for sure departments, or for particular groups utilizing the Azure Portal. The preview launch of Microsoft Loop grew to become obtainable in March 2023.
The way to activate Microsoft Loop in your group
To activate the preview model of Microsoft Loop in your group, you’ll have to make complicated administrative modifications utilizing the Azure Portal. The method includes the creation of a brand new group and corresponding cloud coverage. The process is simply legitimate in case you have an energetic Microsoft Trade license coupled together with your set up of Microsoft 365.
For this instance, we’ll create a static group containing all customers. In case your group is bigger, you could wish to create a dynamic group in order that, when customers are added or faraway from the group sooner or later, the group’s membership shall be adjusted robotically.
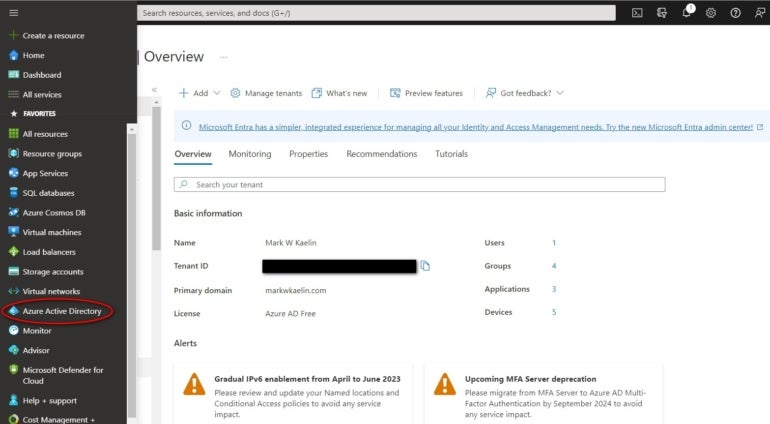
Step one is to log in to the Azure Portal utilizing world or person administrative credentials (Determine A). From the left-hand navigation bar, choose Azure Lively Listing.
Determine A
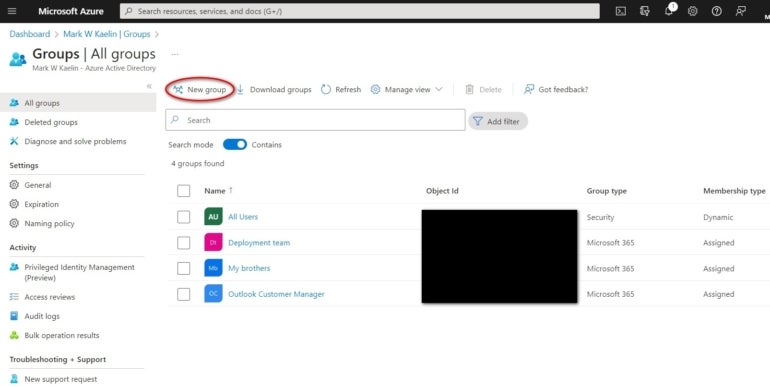
Below the Handle part of the left-hand menu of actions, click on the Teams merchandise (Determine B). Now, click on the New Group hyperlink.
Determine B
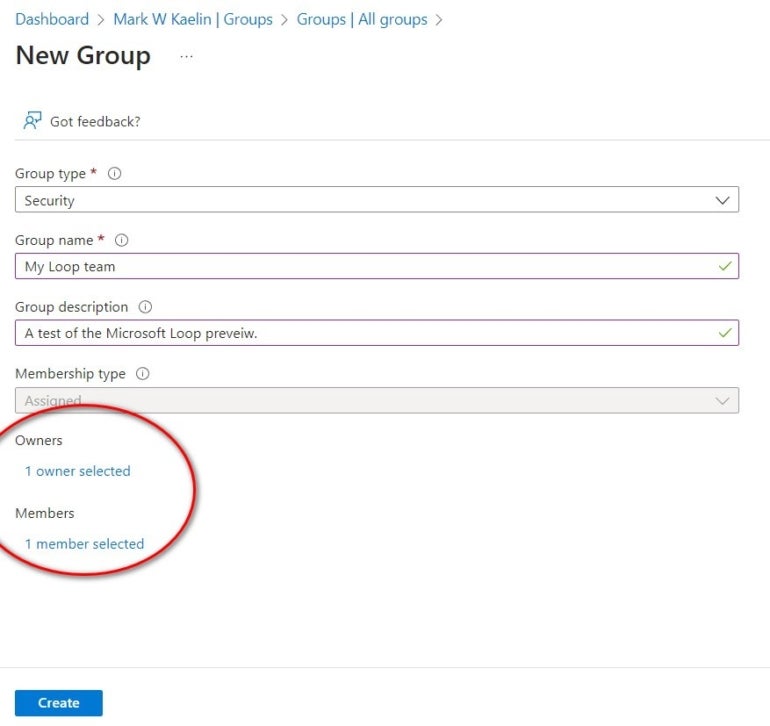
On the New Group web page, you might be requested a number of questions relating to the configuration of your new group (Determine C).
Determine C
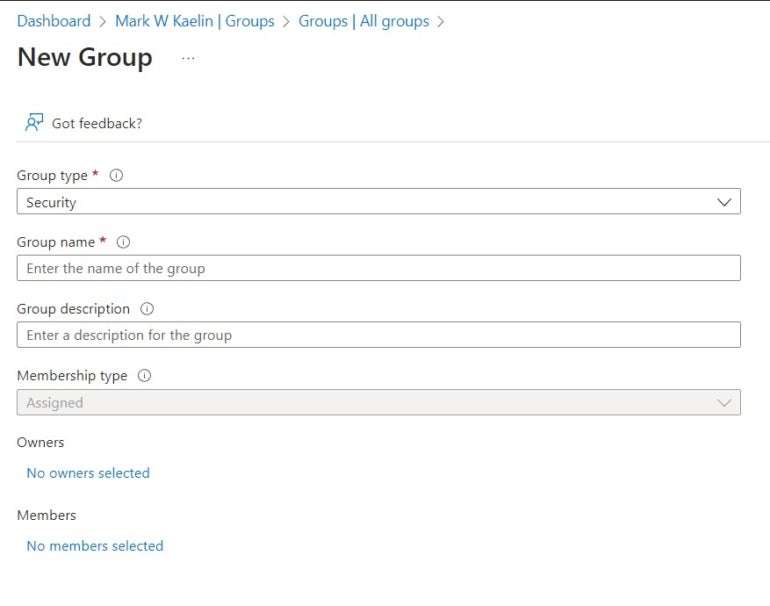
Choose Safety for group sort, after which give your new group a reputation and outline.
In case you are a corporation with a number of energetic customers, you’ll choose Dynamic Person below Membership sort, after which choose Add Dynamic Question. You’ll then have to use this rule:
person.objectId -ne null
In case you are a one-person group, you’ll not have a Membership Sort choice; as a substitute, you’ll create a static membership group (Determine D). First, you’ll choose your self as each Proprietor and Member, after which you’ll click on the Create button to finish the method.
Determine D
The final process is similar no matter whether or not you’re a small operation or an enterprise-level group.
The way to create a cloud coverage for Microsoft 365
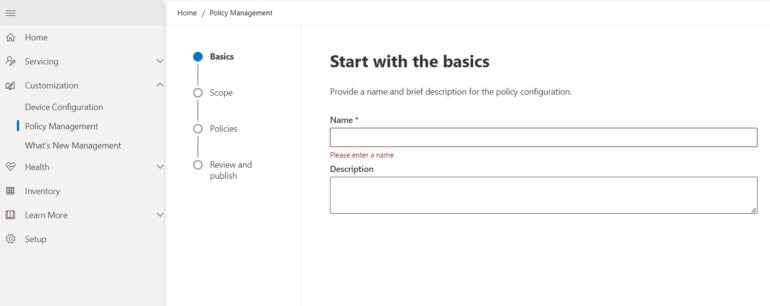
Now that you’ve a brand new group established, you will need to create a brand new cloud coverage for Microsoft 365 related to that group.
Log in to the Microsoft 365 Admin Heart utilizing administrative-level credentials (Determine E). Click on the Customization merchandise within the left-hand listing of actions, choose Coverage Administration after which press the Create button.
Determine E
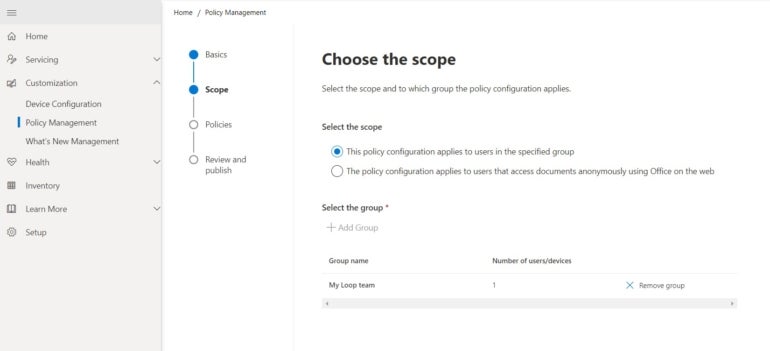
For the scope, choose This Coverage Configuration Applies To Customers In The Specified Group, then choose the group you created in Azure (Determine F). Click on the Subsequent button to proceed.
Determine F
There shall be a protracted listing of insurance policies requiring configuration, however we’re solely involved with Loop insurance policies, so sort “loop” within the filter to condense the listing (Determine G). We shall be altering the configuration of Create And View Loop Information In Loop. The opposite Loop coverage configurations ought to be set to their defaults and mustn’t should be modified.
Determine G
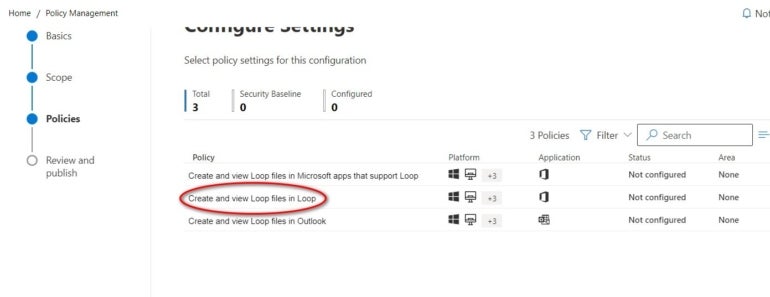
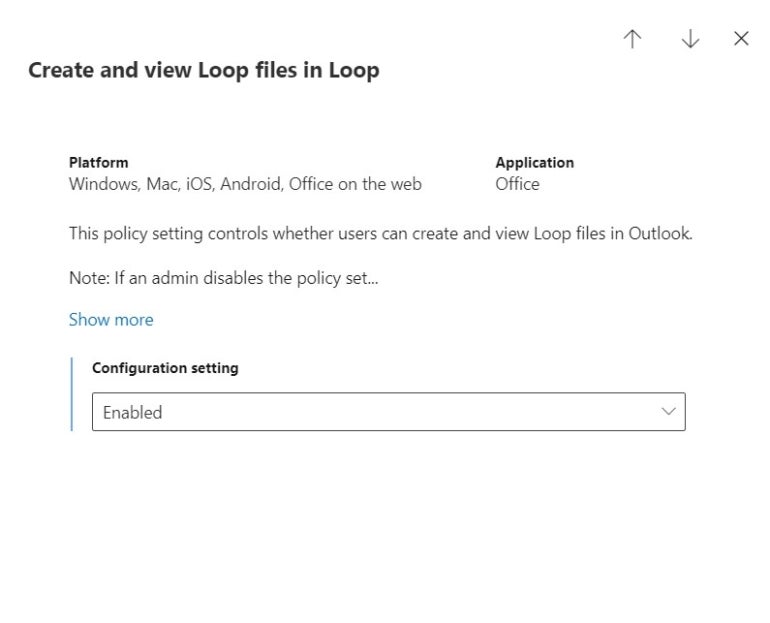
Click on the Create And View Loop Information In Loop merchandise out of your filtered listing and select Enabled from the drop-down listing (Determine H). Click on the Apply button to finish the method.
Determine H
Click on the Subsequent button to evaluate the coverage modifications. In case you are glad with the outcomes, click on the Create button after which the Carried out button.
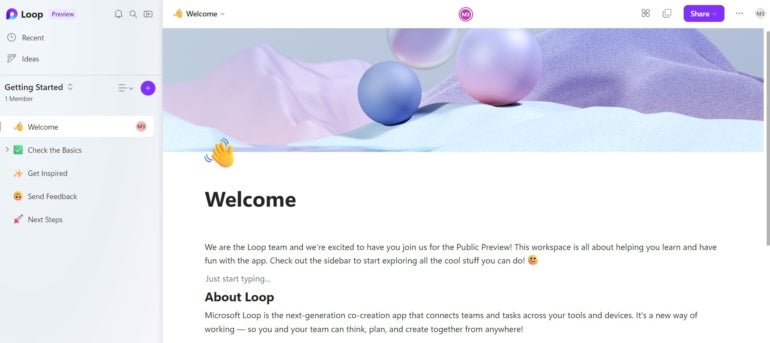
Now, once you go to the Microsoft Loop preview webpage (Determine I), it is possible for you to to check the platform together with your staff.
Determine I