

construct a low-resolution thermal digicam at a low value utilizing Arduino
— August ninth, 2023
Thermal cameras are very helpful instruments, as a result of they allow us to see warmth that might usually be invisible to our eyes. Possibly you’re engaged on a customized PCB and need to see if any of the parts generate extreme warmth. Or possibly you’re involved that your automobile’s exhaust headers don’t warmth evenly and also you need to see what’s happening. Thermal cameras are usually costly, however Vaclav Krejci (AKA upir on YouTube) has a video that explains how one can construct your personal low-resolution thermal digicam with out breaking the financial institution.
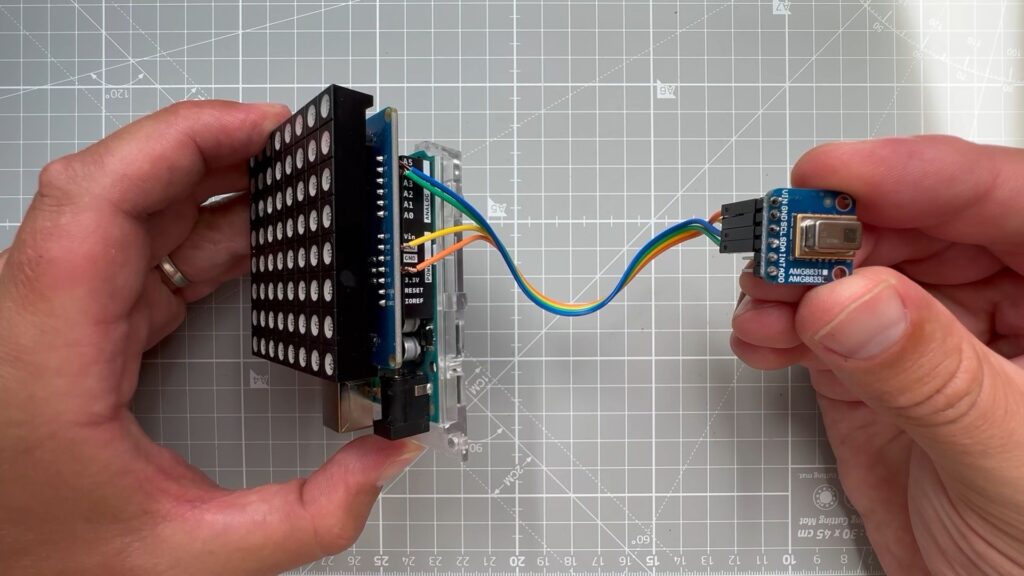
Krejci’s design solely has an 8×8 decision, which is the utmost native output of the AMG8833 infrared sensor array. By standard digital digicam requirements, that’s too low to be usable. However it’s sufficient for some easy duties you may need to carry out with a thermal digicam. At that decision, the machine will act virtually like a non-contact thermometer that reveals you 64 factors. You’ll be able to establish sizzling IC chips and even see massive thermal currents.
The one parts it’s worthwhile to replicate Krejci’s design are an Arduino UNO Rev3 board, an AMG8833 infrared sensor module, and an 8×8 RGB LED matrix (Krejci used a Sunfounder mannequin). The sketch gathers the 64 values from the infrared sensor after which makes use of these to set the hue of every pixel within the LED matrix. The Colorduino library permits you to set pixel colours utilizing the HSV (hue, saturation, worth) mannequin, which makes it simple to alter the colour by adjusting the hue of every pixel.
The result’s an LED show that reveals a warmth map, with cool areas being blue and very popular areas being pink. The decision is low, however every pixel has respectable precision.
You’ll be able to observe any responses to this entry by the RSS 2.0 feed.
You’ll be able to depart a response, or trackback from your personal website.