

In earlier segments, we delved into lidar-based impediment detection and the combination of lidar and lane detection techniques for the ADAS system.
In case you are a design engineer or a newcomer, understanding the excellent design of autonomous electrical automobiles (EVs), drones, and ADAS techniques is essential.
(For a complete overview, discuss with Half 1 and Half 2: Anti-Collision System articles revealed within the June and July points.)
Constructing upon the muse of the sooner ADAS system design, we now progress to implementing lidar know-how to scan the ROS atmosphere. This scanning course of generates real-time maps of the environment utilizing simultaneous localization and mapping (SLAM).
Moreover, our focus is on localizing the automobile inside the map with out counting on GPS information. Such a system inside the ADAS and autonomous automobile drive panorama enhances localization accuracy and aids in path planning even in situations the place GPS connectivity is compromised, equivalent to tunnels or subways.
It considerably aids in navigation by lifeless reckoning, which is a technique of calculating an object’s present place based mostly on a beforehand established level.
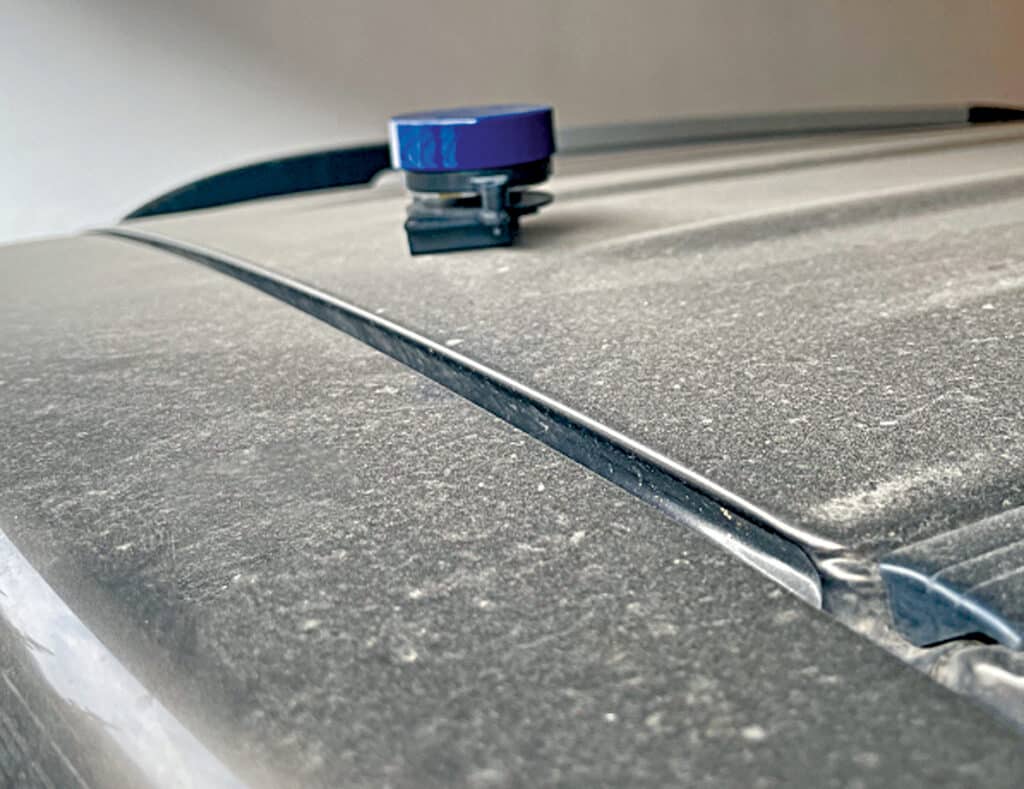
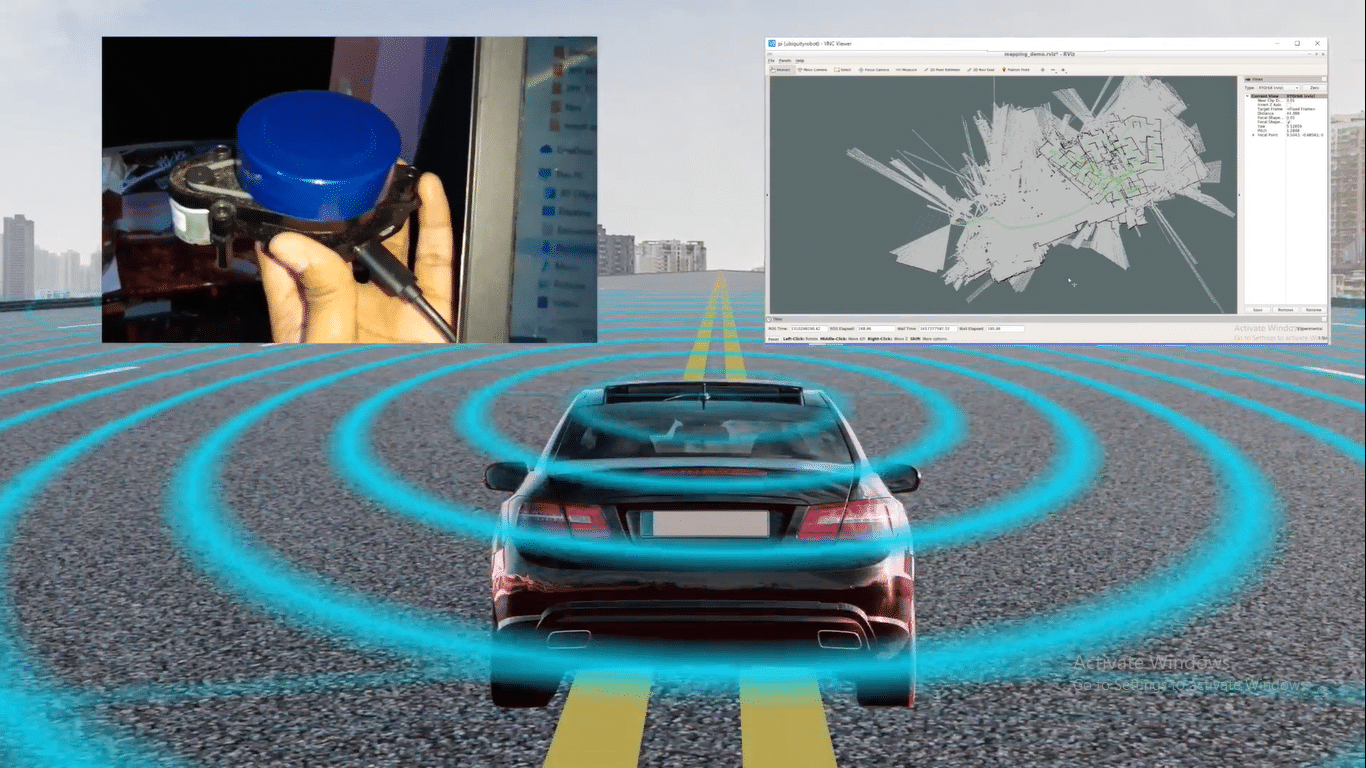
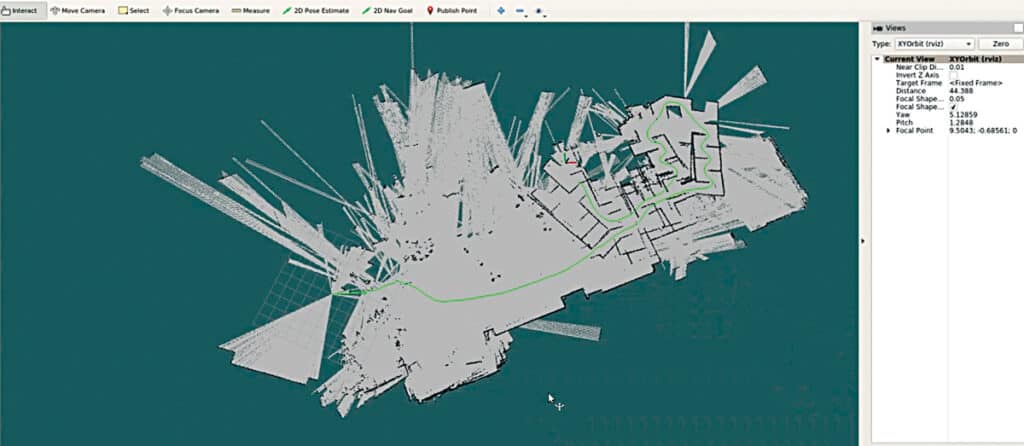
Illustrated in Fig. 1, we observe a automobile outfitted with lidar know-how. Subsequently, Fig. 2 showcases the ROS atmosphere mapping the environment, producing paths (indicated by inexperienced strains) on maps by way of real-time monitoring of the automobile’s motion.
This fusion of capabilities empowers the ADAS system to navigate and drive automobiles with out collisions by effectively avoiding obstacles.
To facilitate this development, a listing of parts required for the challenge is printed in Desk 1. When you’ve got beforehand constructed the ADAS system as per this collection of articles, you possible possess these parts.
| Invoice of Supplies | ||
| Parts | Amount | Description |
| Nvidia Jetson/ Raspberry | 1 | 4GB Ram |
| Lidar | 1 | 360 diploma lidar |
| SD card | 1 | 32/64GB |
| HDMI show | 1 | 17.8cm HDMI show |
Earlier than delving into the challenge, it’s important to familiarize your self with three key ideas: SLAM, Hector SLAM, and lifeless reckoning.
SLAM (simultaneous localization and mapping): It’s a basic drawback in robotics and laptop imaginative and prescient, the place the objective is for an autonomous system (equivalent to a robotic or a self-driving automotive) to concurrently construct a map of its atmosphere and precisely decide its personal place inside that map in actual time.
Hector SLAM: It’s a common and environment friendly open supply SLAM algorithm designed for cellular robots. The important thing function of Hector SLAM is that it’s a feature-based algorithm, which means it focuses on detecting and monitoring options (equivalent to strains or edges) within the atmosphere to construct the map and estimate the robotic’s pose.
Useless Reckoning: That is a vital navigation approach for estimating the present place of a shifting object based mostly on its earlier identified place (final repair), motion information (velocity, heading, and time), that are generally employed when GPS information is unavailable. Additionally it is referred to as “deduced reckoning” or “DR.”
Putting in Hector SLAM
Earlier than putting in the Hector SLAM, first, set up the robotic working system (ROS). In our earlier article we shared the step-by-step information to put in robotic working system.
Subsequently, arrange the drivers and software program growth package (SDK) to your lidar. If using the RPI lidar, you’ll be able to instantly proceed to Hector SLAM set up. Nevertheless, if using the YD lidar, proceed with the next steps:
git clone https://github.com/YDLIDAR/
YDLidar-SDK
cd YDLidar-SDK/construct
cmake .
Make sudo make set up
Examine Github YD-LDR for assets.
Subsequent, create the ROS workspace for the lidar after which set up the ROS driver utilizing the next instructions within the LXTerminal:
mkdir -p ~/ydlidar_ws/src
cd ~/ydlidar_ws
catkin_make
echo “supply ~/ydlidar_ws/devel/setup.
bash” >> ~/.bashrc
supply ~/.bashrc
cd ~/ydlidar_ws/src/ydlidar_ros_driver/
startup
sudo chmod +x initenv.sh
sudo sh initenv.sh
Integrating Hector SLAM
Open a brand new LXTerminal and run the next command to put in Hector SLAM:
sudo apt-get set up ros-kinetic-hector-
slam
wgethttps://storage.googleapis.com/
google-code-archive-downloads/v2/code.
google.com/tu-darmstadt-ros-pkg/Team_
Hector_MappingBox_RoboCup_2011_Rescue_
Enviornment.bag
The Hector SLAM is now prepared. Modify some lidar settings within the lidar launch file for indoor positioning.
To take action, first, go to the YD lidar workspace and open the src file.
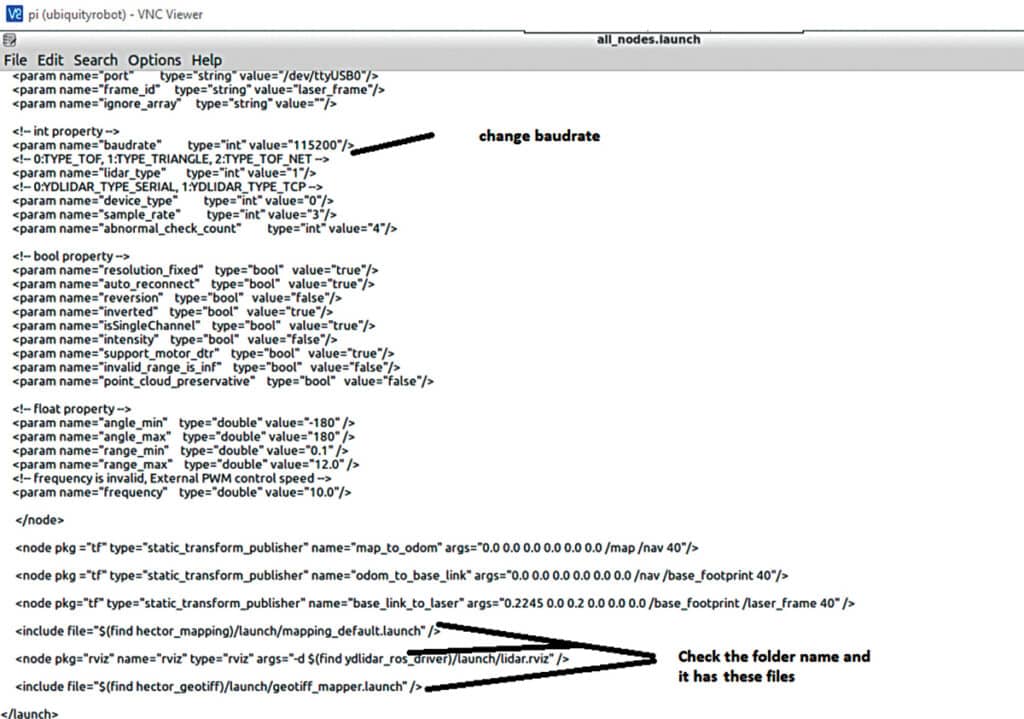
Then open all nodes.launch file and alter the parameters as per Fig. 3, which reveals configuration of the ROS nodes in keeping with lidar.
Testing
Join the YD lidar to the USB port of the RPi board/Nvidia Jetson board, energy it, and entry its desktop GUI.
For positioning, execute the next command within the LXTerminal:
roslaunch ydlidar_ros_driver all_nodes.launchThis command will generate a map showcasing the robotic’s present place and its instant environment.
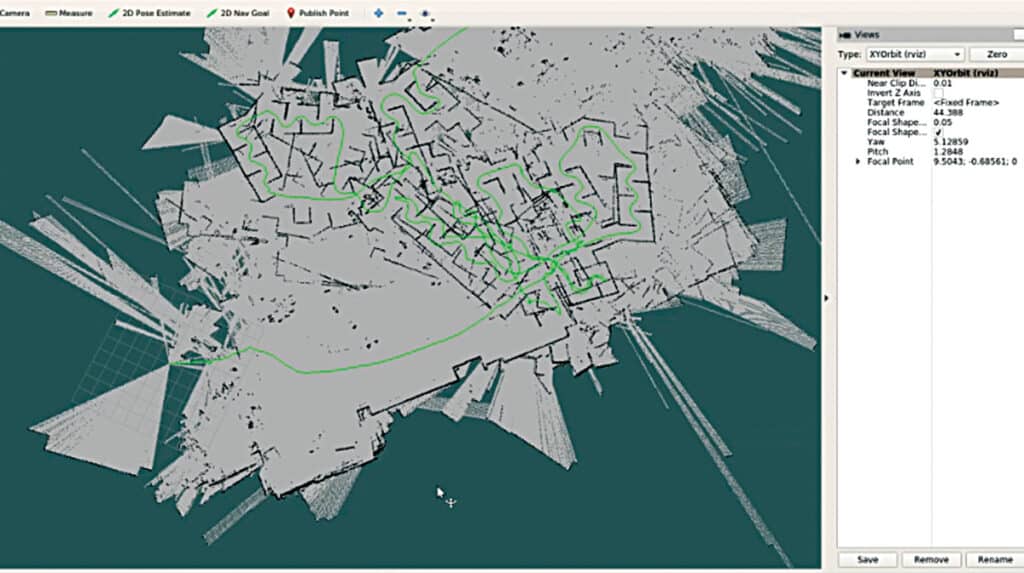
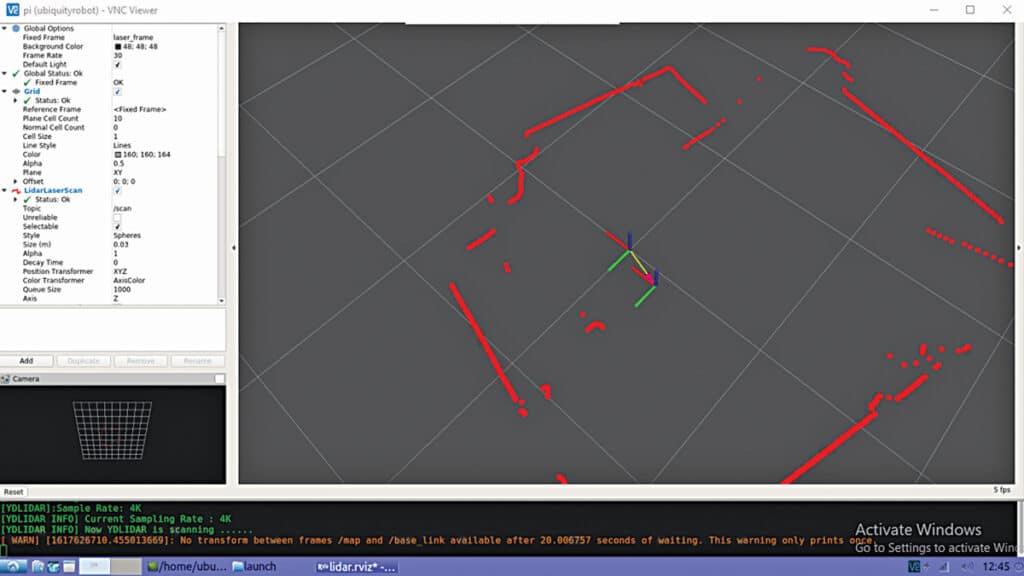
Fig. 4 presents the SLAM information, whereas Fig. 5 illustrates the ROS Hector SLAM’s depiction of mapped paths captured by way of lidar.
In subsequent phase, we are going to merge this ROS atmosphere with the earlier lane detection system.
By doing so, we are going to set up an built-in framework for implementing autonomous driving and the ADAS system.
To check the Hector SLAM and procure a real-time map, run the next instructions:
roslaunch hector_slam_launch tutorial.launch
rosbag play Team_Hector_MappingBox_
RoboCup_2011_Rescue_Arena.bag --clock
rostopic pub syscommand std_msgs/String “savegeotiff”
Examine the video tutorial under for higher understanding-
Ashwini Kumar Sinha, an IoT and AI fanatic, is a tech journalist at EFY