

In November 2018, Microsoft launched Dataflows in public preview. Afterward, in April 2019, Dataflows grew to become usually out there. Dataflows was out there in Premium licenses solely, however it’s now out there in Energy BI Professional with some limitations. The aim of Dataflows is to help collaborative self-service knowledge preparation and Extract, Remodel, and Load (ETL) processes in a corporation by leveraging the ability of Energy Question within the cloud.
This text is an excerpt from the e-book Knowledgeable Knowledge Modeling with Energy BI, Second Version written by Soheil Bakhshi.
Within the following article, we’ll learn to create a Dataflow throughout the Energy BI Service, earlier than trying into create a brand new entity, a desk throughout the Dateflow.
Create Dataflows
To create a Dataflow, we should log into our Energy BI Service in an online browser. The next steps present begin creating new Dataflow:
- Choose a desired Workspace.
- Click on the New button.
- Click on Dataflow.
The previous steps are highlighted within the following picture:
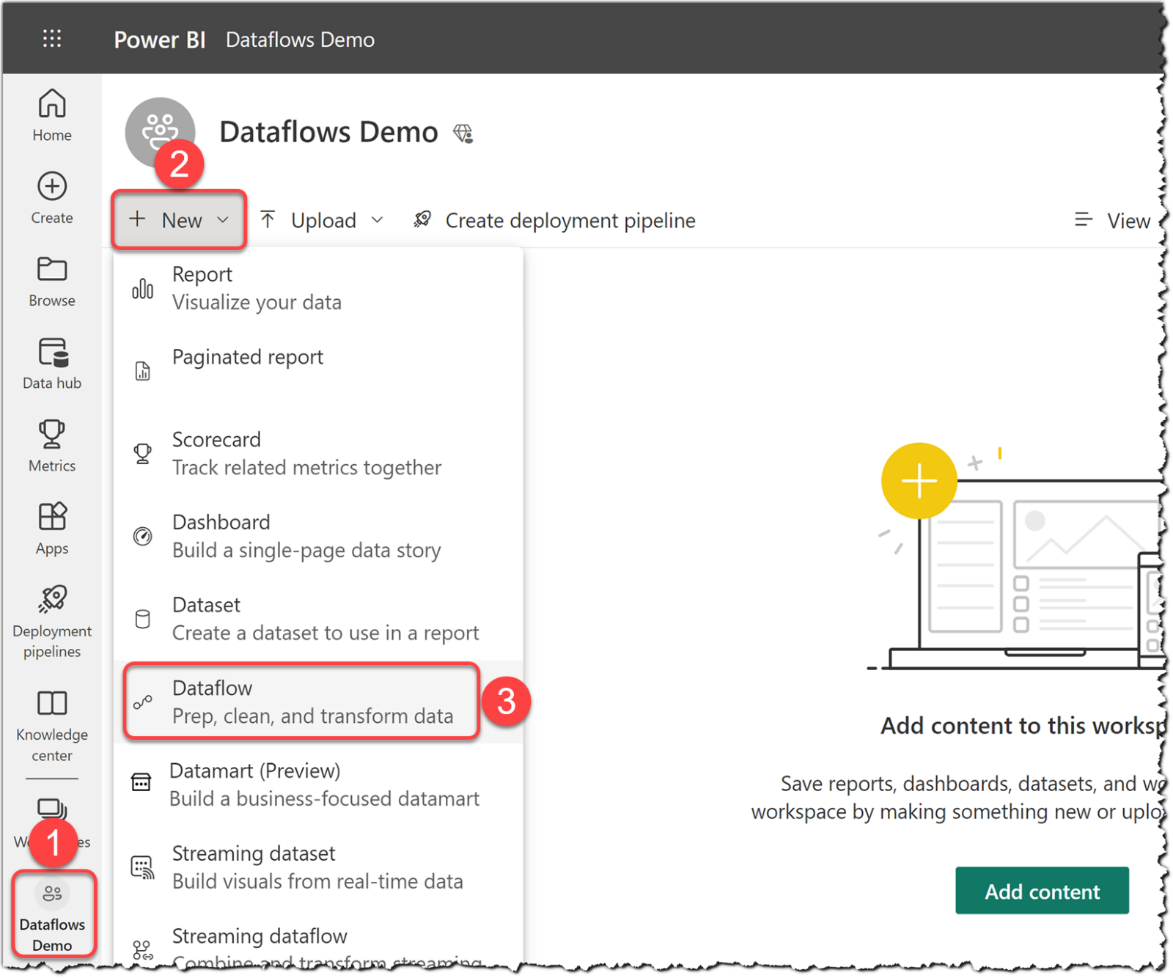
Determine 1: Creating Dataflows within the Energy BI service
Dataflows should not out there in Private Workspaces (My Workspace).
We have now one of many following choices:
- Outline new tables
- Hyperlink tables from different Dataflows
- Import Mannequin
- Connect a Frequent Knowledge Mannequin folder (preview)
The next picture reveals the previous choices:
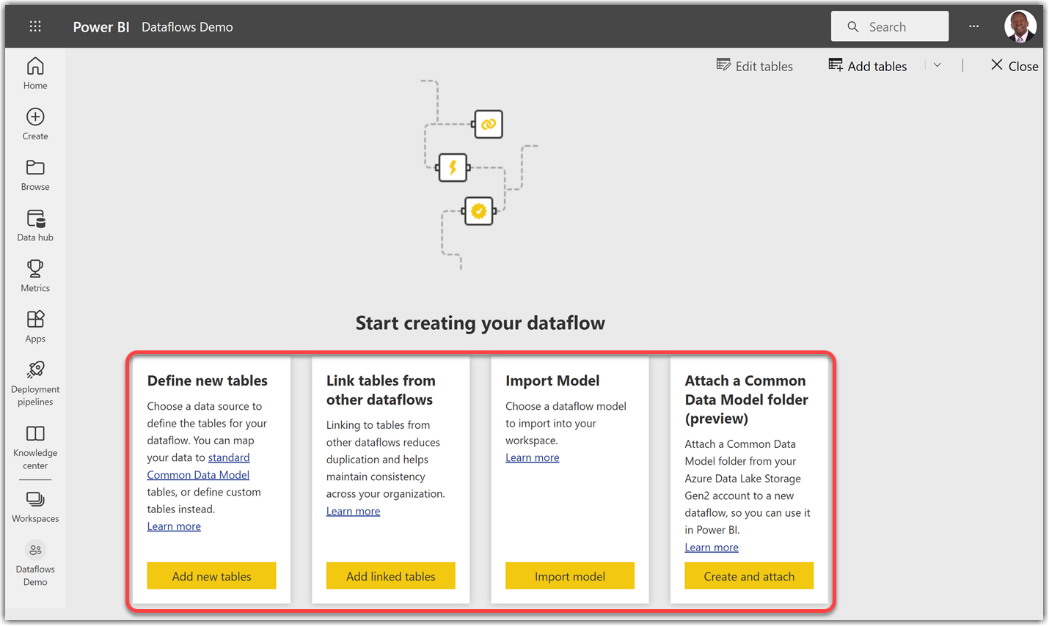
Determine 2: Accessible possibility to begin creating a brand new Dataflow
Because the previous picture reveals, all choices to create a brand new Dataflow can be found to begin creating a brand new Dataflow; nevertheless, if the Workspace will not be Premium, we will nonetheless create linked tables and computed tables, however we can not refresh the Dataflow. The next sections present create new tables, linked tables, computed tables, and import fashions. We don’t focus on Connect a Frequent Knowledge Mannequin folder as a result of it’s in preview and has not been launched but.
Create new entities
Up to now, we have now navigated to the specified Workspace. Now we need to create tables within the Dataflow. To create a brand new desk from the choices out there (as proven in Determine 3), we comply with these subsequent steps:
- Click on Add new tables button, as illustrated within the following picture:
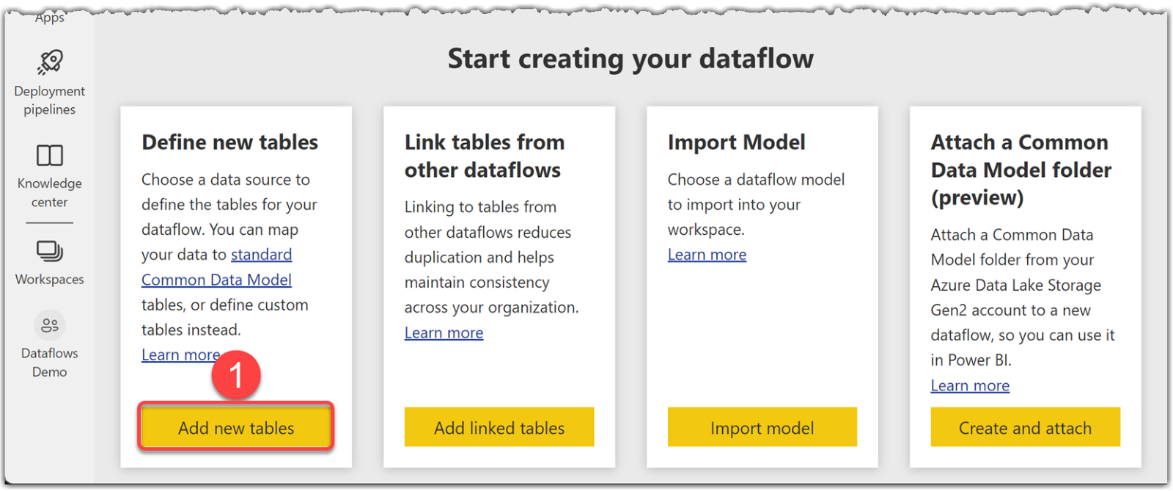
Determine 3: Including new tables inside a Dataflow
- Choose any desired knowledge supply connector, as illustrated within the following picture:
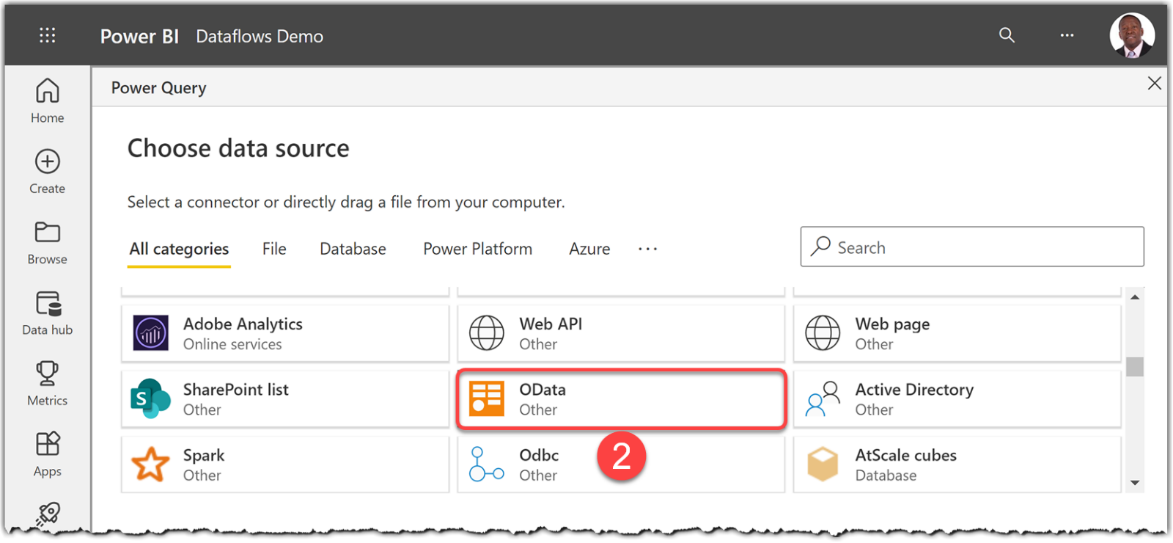
Determine 4: Choosing an information supply connector
- Fill within the Connection settings fields.
- Click on Subsequent.
The previous steps are highlighted within the following picture:
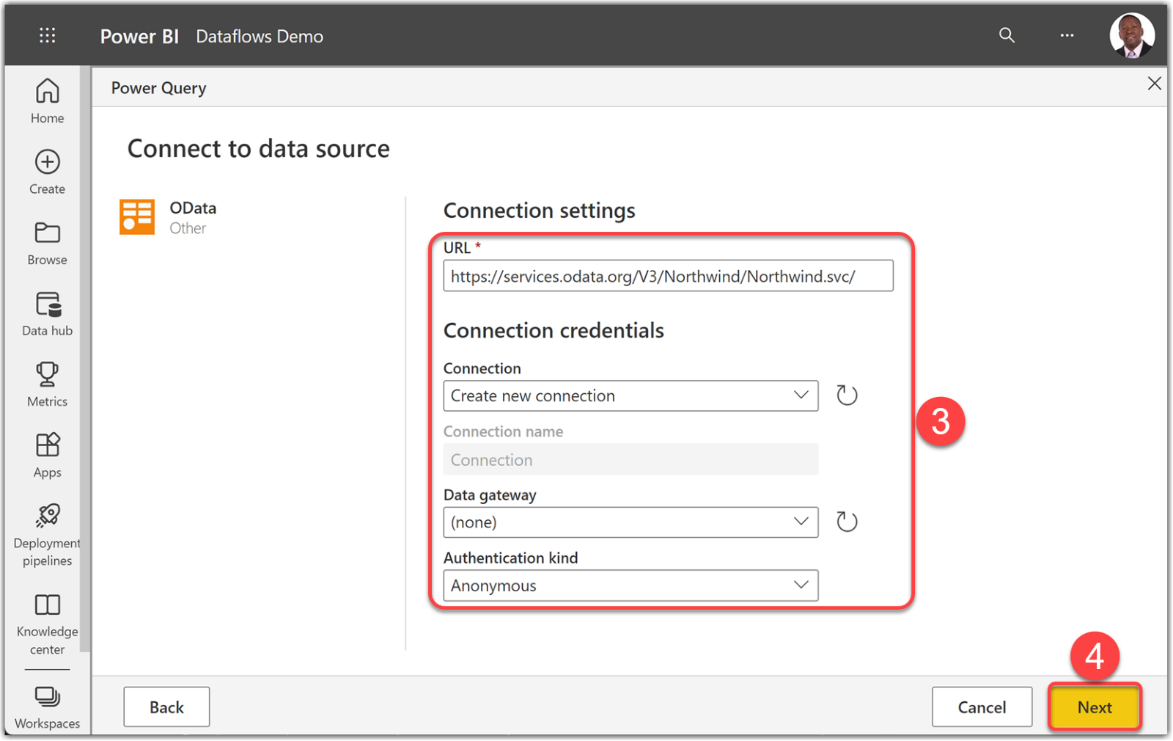
Determine 5: Filling within the Connection settings fields
- Choose tables from the Select knowledge pane from the Energy Question kind. Relying on the chosen knowledge supply, you may even see a distinct kind. We used a Northwind OData pattern out there right here.
- Click on Remodel knowledge.
The previous steps are highlighted within the following picture:
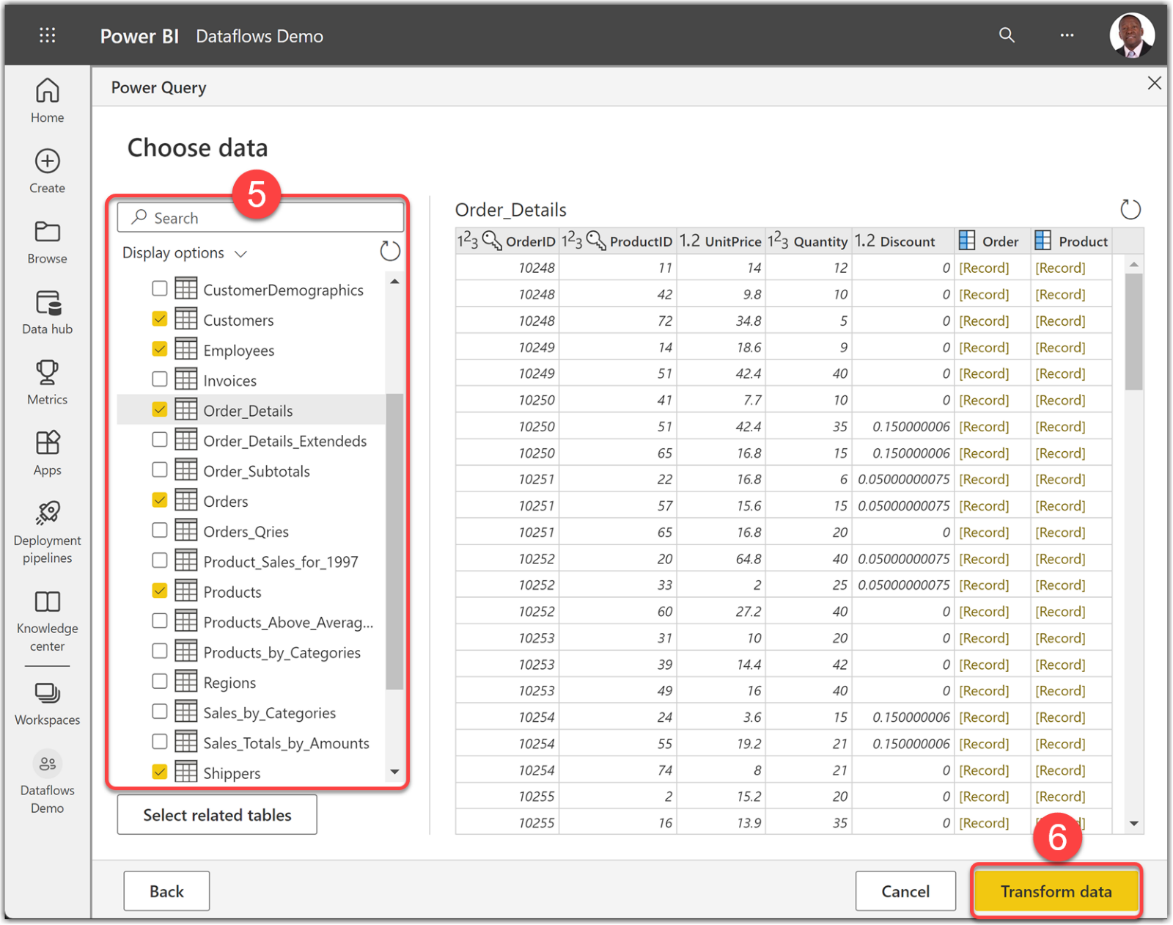
Determine 6: Energy Question – Select knowledge kind when creating a brand new Dataflow
If we choose an on-premises knowledge supply, we have to choose an up and working on-premises Knowledge Gateway.
Abstract
We have now now created a Dataflow throughout the Energy BI Service and subsequently create new entities, or tables. By following the step-by-step directions, customers can simply arrange and handle their Dataflows, leveraging numerous knowledge supply connectors and remodeling knowledge utilizing Energy Question. The significance of choosing the suitable workspace kind has been highlighted, making certain entry to all out there choices.
The submit How one can create a Dataflow throughout the Energy BI Service appeared first on Datafloq.