
Evan and Katelyn, an superior husband-and-wife-maker-team created a 3D printed walnut and copper lamp. They’re so cool, that they’re letting us put up the venture for a weekend construct!
Posted on December 22, 2017
by
Rhonda Grandy – Courtesy of Evan and Katelyn
Evan and Katelyn are the final word DIYers! They’ve created a variety of initiatives that embody every kind of creating, like woodworking, welding, and naturally – 3D printing! Lately, they created a contemporary lamp that had a 3D printed body, walnut wooden, and copper tape. Try their video!
Evan and Katelyn printed the bottom/body of the lamp on the LulzBot TAZ 6 and used MatterHackers PRO PLA. If you have not used PLA filament earlier than, try this information on the best way to succeed when printing with PLA. What’s superior about this venture is that you may scale the mannequin to suit any 3D printer, so even if you’re rocking a smaller scale machine, you may make your self a cool mini lamp that is good for an workplace desk, facet desk – something actually!
Learn how to Make a 3D Printed Picket Walnut Lamp
Evan and Katelyn had been form sufficient to share this venture with us to assist exhibit the cool ways in which you should use 3D printing. Listed here are the steps so you’ll be able to construct your personal!
Supplies
- 3D printed Lamp body
- Copper Tape
- Lamp Equipment
- Band Noticed
- Belt Sander
- Drill
- Drill Bits
- Natchez Resolution wooden oil
- Tremendous Glue
- E6000 Adhesive
- Paper
- Pencil
- Scissors
Step 1: 3D Print the Lamp Mannequin
Evan and Katelyn have uploaded their lamp mannequin (and a ton of different cool fashions) to Thingiverse right here.
Additionally, discover ways to use Tinkercad to design and 3D print your personal lamp mannequin! Unsure which 3D modeling software program is best for you? Try this text that will help you discover the right one.

Completed lamp 3D print on the LulzBot TAZ 6
Step 2: Drill the Lamp Thread
Utilizing your drill, drill a 23/64″ bit gap to be able to thread your lamp screw into the 3D printed prime of the lamp.

Evan testing drill bits to get the opening for the lamp screw excellent
Step 3: Minimize a Template for the Wooden Items
Utilizing paper, scissors, and pencils, create a paper template for the wool panels of the lamp. Use the 3D printed lamp body to get the right sizes.

Katelyn slicing/putting the wooden panel templates like a champ
Step 4: Apply the Copper Tape to the 3D Printed Lamp
Apply the copper tape to the sides of the 3D printed lamp. Remember to get the tape as clean as doable to keep away from wrinkles.

Making use of the copper tape to the 3D printed half
Step 5: Minimize the Wooden Panels for the 3D Printed Lamp
Glue the paper templates from Step 3 onto the wooden and use the band noticed to chop the items. As soon as the items are minimize, use the belt sander to create the chamfers to suit snugly into the 3D mannequin.

Slicing the wooden into the panels for the lamp utilizing the band noticed
Step 6: Oil the Wooden Panels
As soon as your panels are all minimize, apply a beneficiant coat of oil.

Add oil to the wood panels
Step 7: Glue the Picket Panels to the 3D Printed Lamp
Glue the wood panels on to the 3D printed half, after which use tape to carry them in place whereas they dry. Electrical tape left a bit residue behind, however it got here off with a bit effort.

Electrical tape to carry the glued items in place
Step 8: Set up the Lamp {Hardware} and Shade
Observe the directions in your lamp package to correctly wire the lamp and setup your lamp. Bear in mind so as to add the shade earlier than you screw within the lightbulb!

Wiring the Lamp
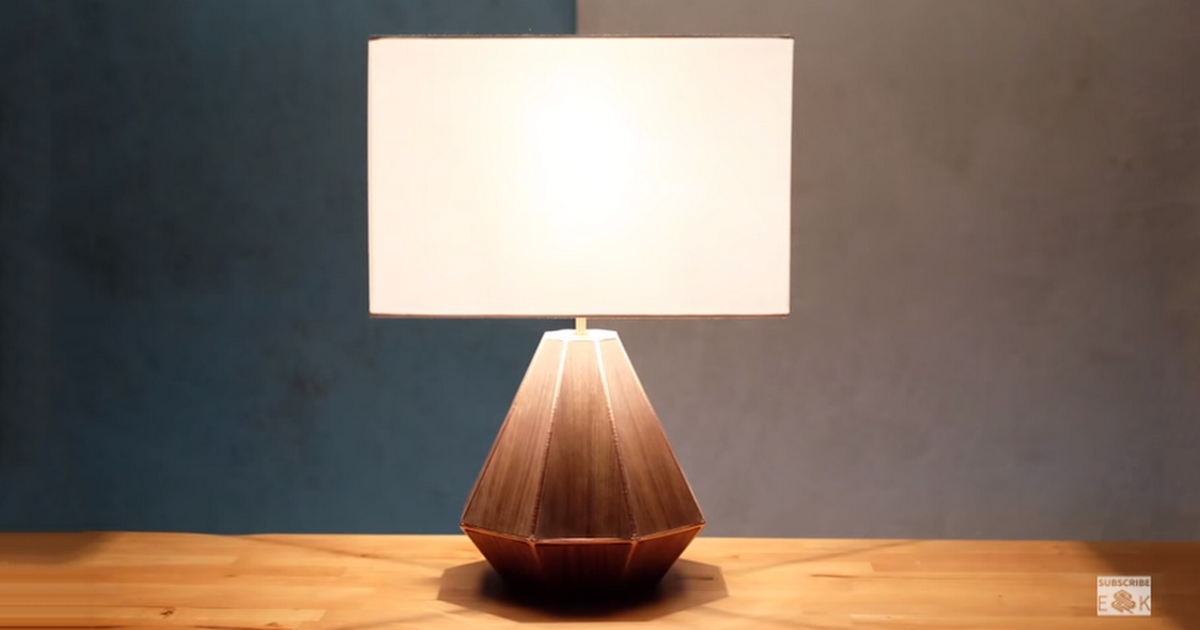
And that is it! Due to Evan and Katelyn you now have a candy new fashionable lamp!
For extra superior initiatives from Evan and Katelyn, subscribe to their YouTube channel right here. You can too comply with the behind the scenes of all their initiatives by following them on Fb, Instagram, and Twitter.

The ultimate product!
Do you have got a suggestion for a weekend construct? Tell us within the feedback under or at MatterHackers.com!