
Have you ever ever wished to create your personal IoT climate station? This venture demonstrates the way to create a climate station monitored with Arduino Cloud.
Mission Issues
Earlier than continuing with this venture, there are lots of issues to issue into your design selections. The next are a couple of examples, however not the extent of the components which will have an effect on your climate station.
- Soil Moisture
- On this venture, we won’t be incorporating the soil moisture sensor as a result of our climate station might be mounted to the roof of the constructing. Nevertheless, customers might want to account for the quantity of cable required for his or her setup and the publicity of {the electrical} elements on the sensor.
- Humidity
- Whereas it might be superb to deal with the electronics in a very waterproof enclosure, this may tremendously have an effect on the readings from the sensors. With correct airflow, the humidity sensor will present appropriate readings.
- UV Mild
- The enclosure ought to permit UV mild to move by; in any other case, the UV sensor will be unable to make measurements of the daylight. As well as, customers ought to think about how the sunshine will hit the sensor all through the day.
- Temperature
- Just like how a greenhouse traps the Solar’s power inside to maintain vegetation heat, an enclosure may also be prone to the greenhouse impact. On this case, the within of the enclosure would warmth up past the ambient air temperature and supply inaccurate readings.
- Environmental Components
- Climate and electronics often do not combine nicely with one another.
- Mud and water are a recipe for catastrophe with regards to electronics. Chances are you’ll wish to think about a conformal coating to guard the board from the weather if you’re not utilizing a sealed enclosure.
- When mounting your climate station exterior, think about components similar to excessive wind, lightning, and so on.
- The pole within the climate meter package is metallic and will act as a lightning rod, the place a lightning strike may arc and observe the facility cable from the climate station.
- With excessive winds, your harmless climate station could turn into a weapon of destruction if it will get free.
- For enclosures that are not fully sealed, the mixture of excessive wind and rain may permit water to penetrate the enclosure.
- Even when your enclosure is totally sealed, you might wish to have a desiccant bag to stop condensation from forming. (Because the enclosure is already sealed, the humidity readings won’t be related.)
- Climate and electronics often do not combine nicely with one another.
Supplies
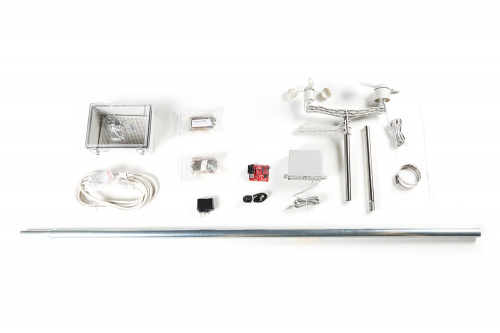
Relating to measuring climate precisely, some specialised sensors are required. Fortunately, the SparkFun Arduino IoT Climate Station consists of virtually every thing required to construct your climate monitor station.
- Customers might want to buy a suitable enclosure, mounting {hardware}, and energy equipment individually. (Most of these things will be discovered at your native ironmongery shop.)
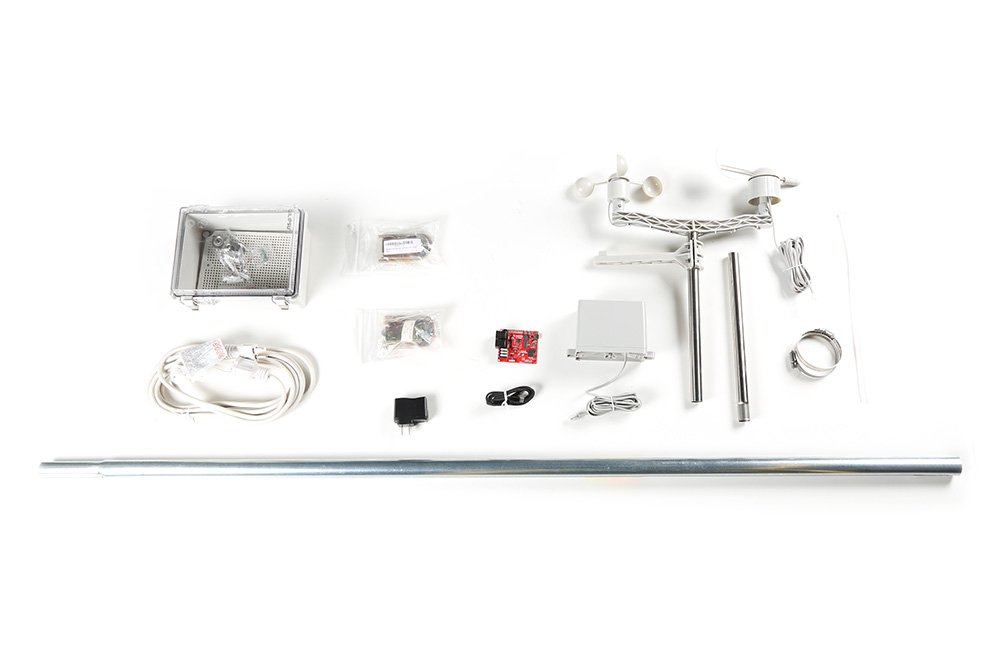
Elements utilized in our climate station setup. (Click on to enlarge)
{Hardware} Setup
Climate Meter Package
Customers might want to assemble the climate meter package. If you’re unfamiliar with the climate meter package, try our meeting information:
Enclosure
The enclosure are housed the electronics and shield them from the weather.
- Connect the MicroMod ESP32 Processor board to the Climate Service board.
- Program the board (see Software program Directions part under)
Notice: We advocate that customers program their board and check their sensors and WiFi connection in a managed setting earlier than mounting any exterior {hardware}. This can facilitate troubleshooting and isolate points associated to the enclosure, mounting {hardware}, mounting location, and/or WiFi connection.
- Program the board (see Software program Directions part under)
- Mount provider board to the enclosure
- Drill gap(s) for wiring
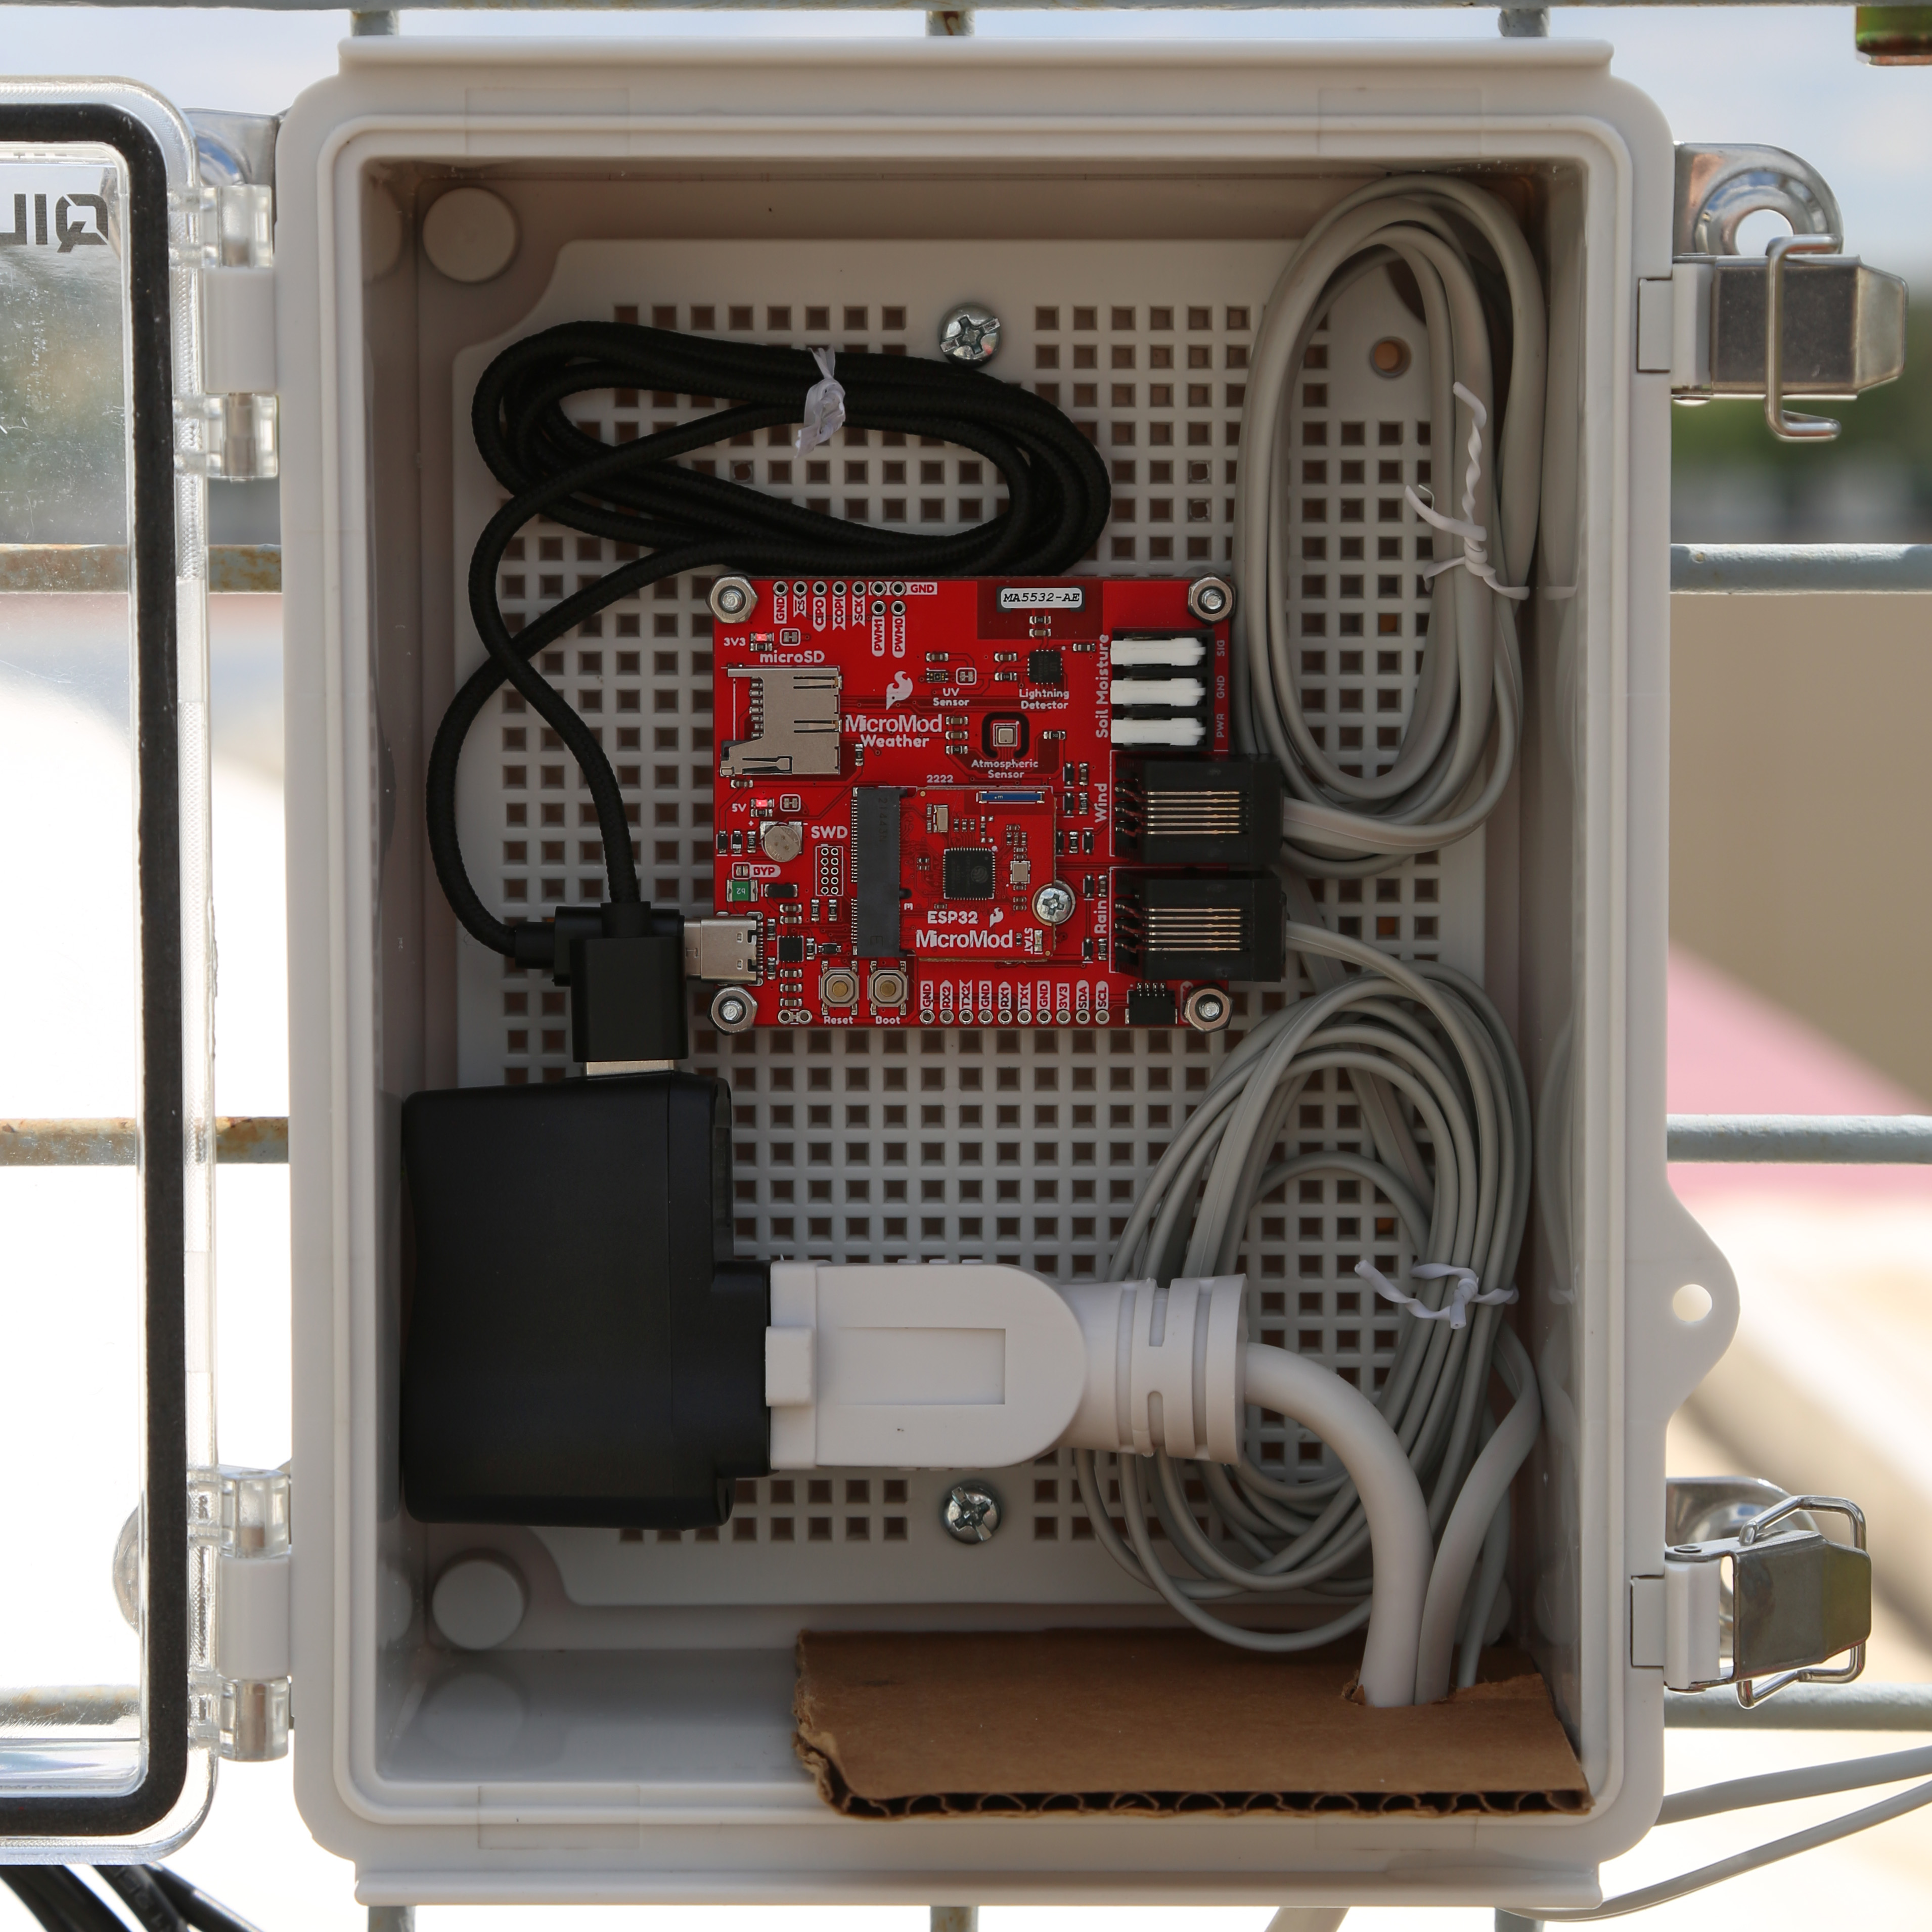
The electronics housed in our enclosure. (Click on to enlarge)
Mounting the Climate Station
- Mount the climate meter package
Notice: When mounting the climate meter package, orient the wind vane sensor to the suitable cardinal instructions. In any other case, customers ought to recalibrate the sensor’s ADC values within the Arduino sketch.
- Mount the enclosure
- Join the facility and RJ45 sensor cables to the climate provider board
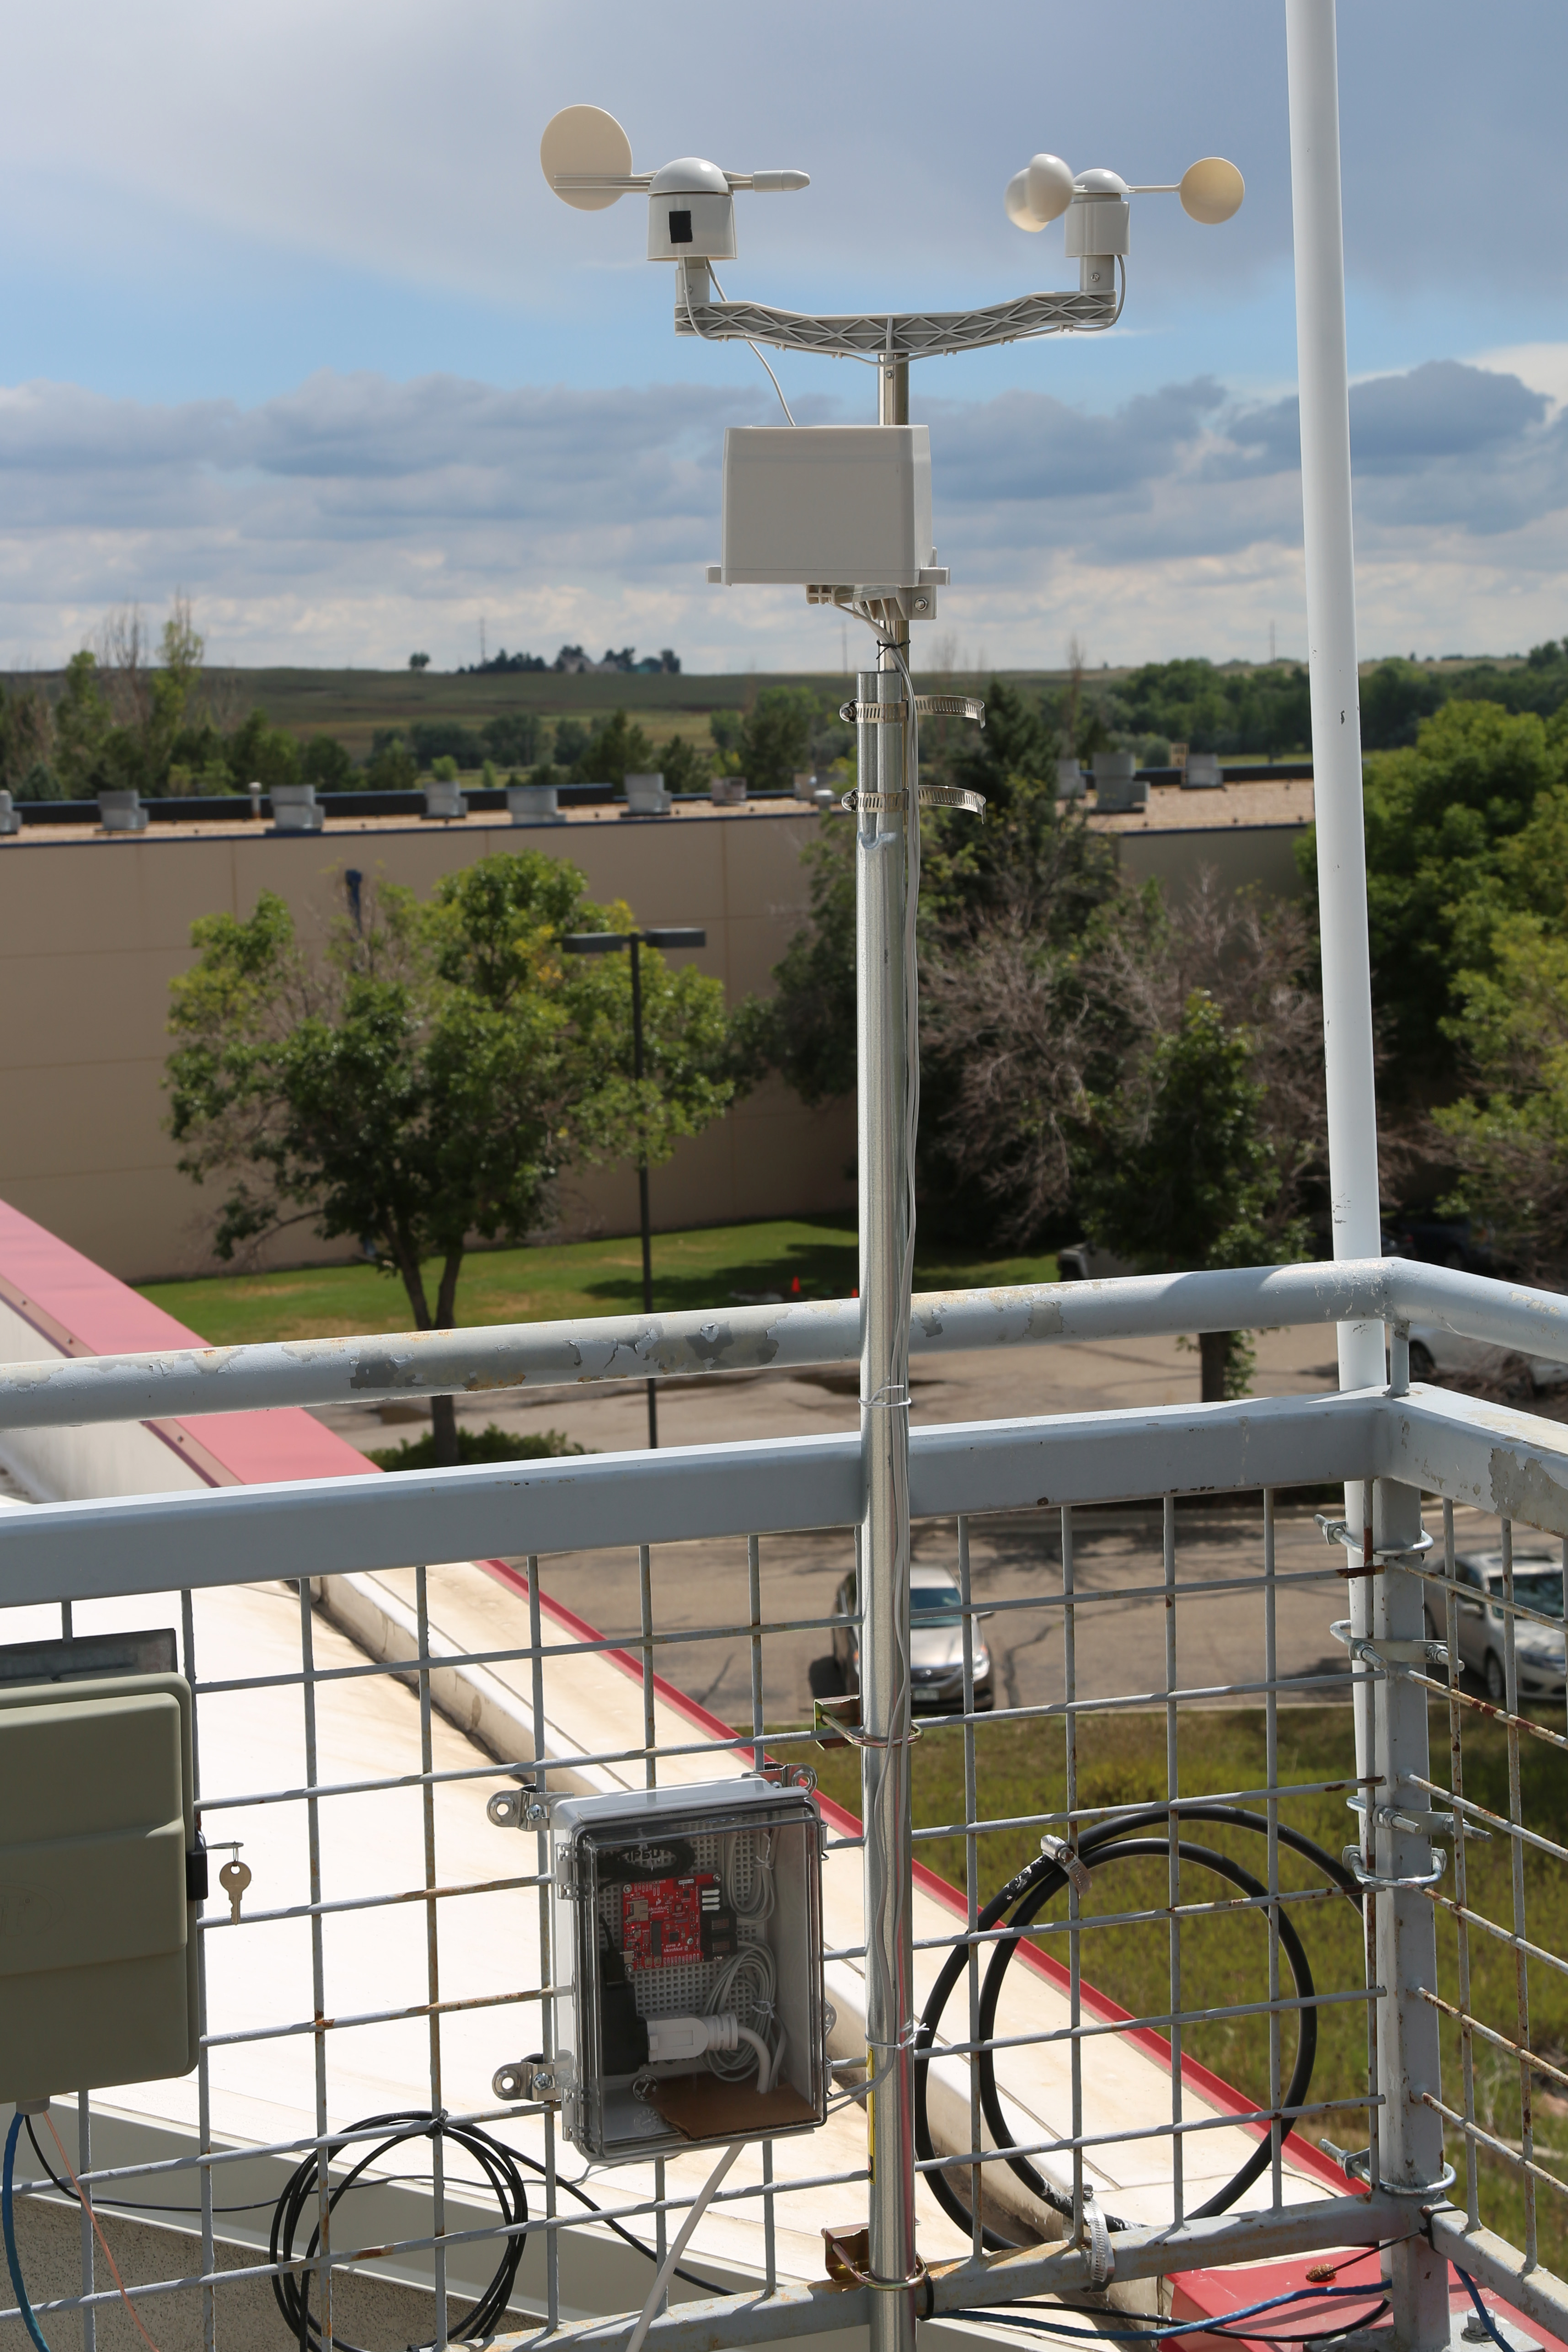
Our climate station is mounted on the roof of the SparkFun HQ constructing. (Click on to enlarge)
Software program Directions
The software program and venture directions will be discovered on the Arduino Mission Hub: Climate Station with Arduino Cloud. Customers may also obtain the code from the GitHub repository for the venture.
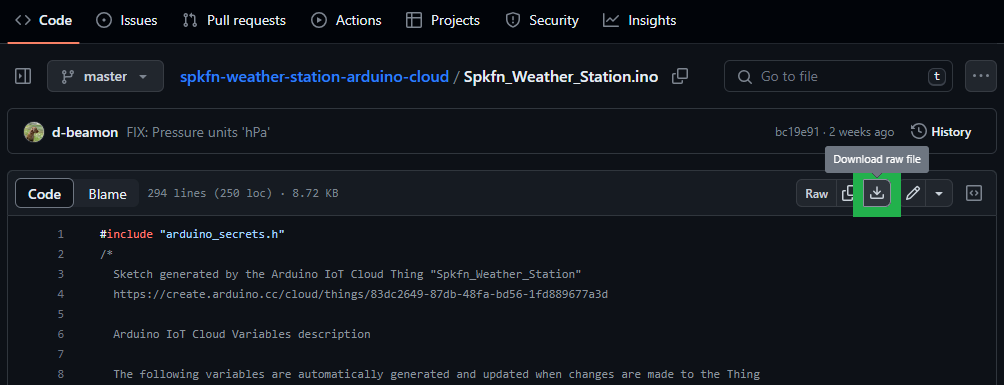
Click on on the button (inexperienced) to manually obtain the Arduino sketch. (Click on to enlarge)
Notice: The Arduino Mission Hub put up does an incredible job of summarizing the data wanted to arrange your system and dashboard. Nevertheless, if you’re nonetheless aware of the Arduino Cloud platform and wish to see their full directions on creating a tool, configuring a factor, and dashboard, please try their getting began tutorial.
Notice: Within the Mission Hub put up, there’s a desk of variables from the Arduino sketch. The Beginning Plan column signifies which Arduino Cloud plan(s) will permit customers to entry these variables (see the Notice under).
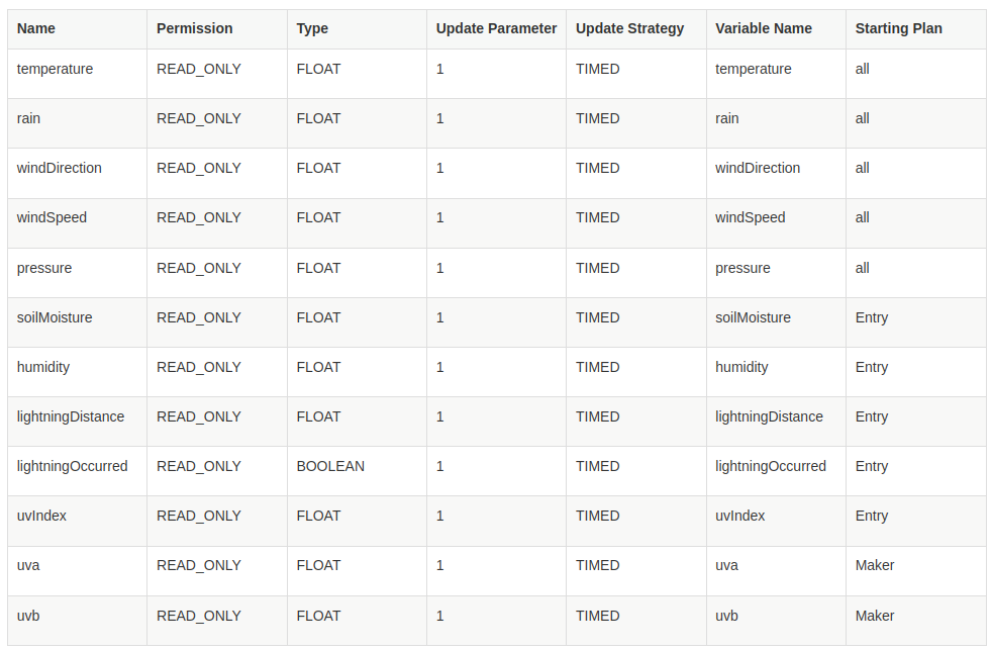
Arduino Cloud plans and the variables out there within the Arduino sketch. (Click on to enlarge)
Notice: Relying in your Arduino Cloud subscription, you have got a restrict on the variety of most variables which might be out there to configure. (Examine the complete record of supported options for every plan.)
Most variety of variables per plan:
- Free: 5
- Entry: 10
- Maker and Maker+: Limitless
For instance, you solely must create _uvIndex_ variable you probably have an Entry or superior plan ( Entry, Maker, or Maker +).
Get pleasure from!!!
After the {hardware} setup and programming was performed, we arrange our Arduino Cloud account and created our dashboard. The brand new climate station was then mounted on the roof of the SparkFun HQ constructing. Here’s a have a look at the information from our new climate station on the Arduino Cloud dashboard:
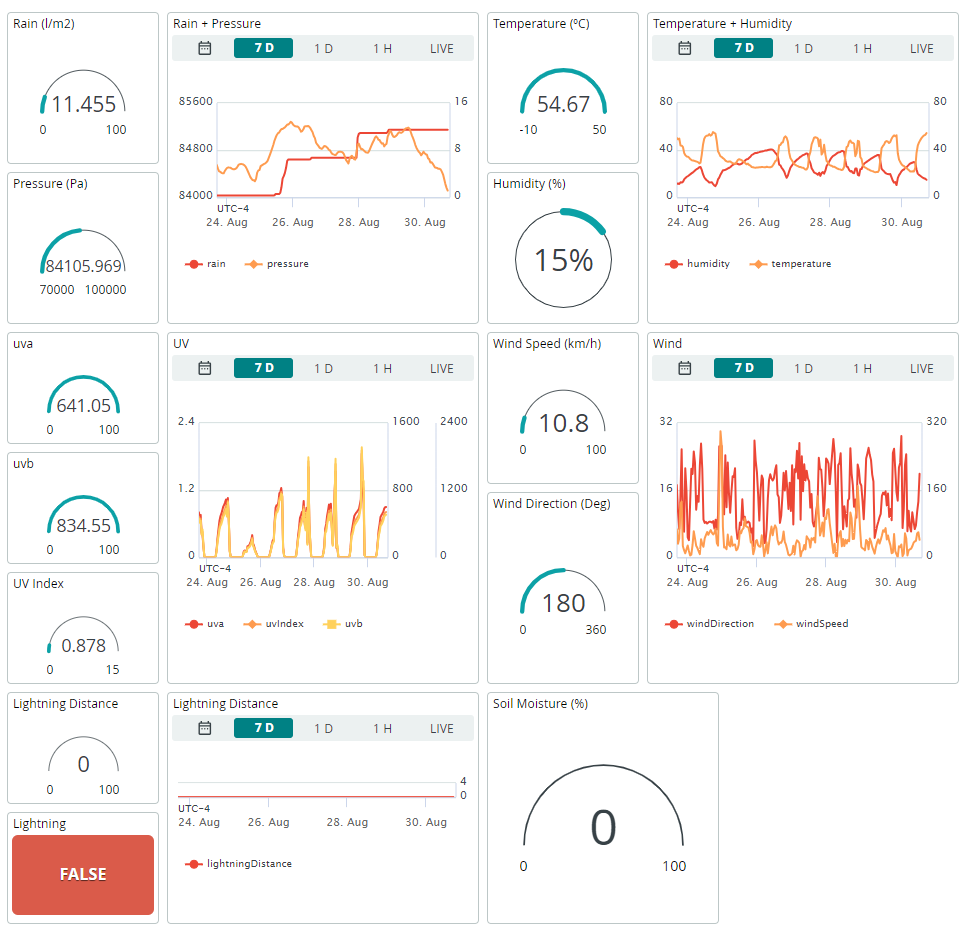
A screenshot of the dashboard on the Arduino Cloud platform displaying the information from our climate station. (Click on to enlarge)
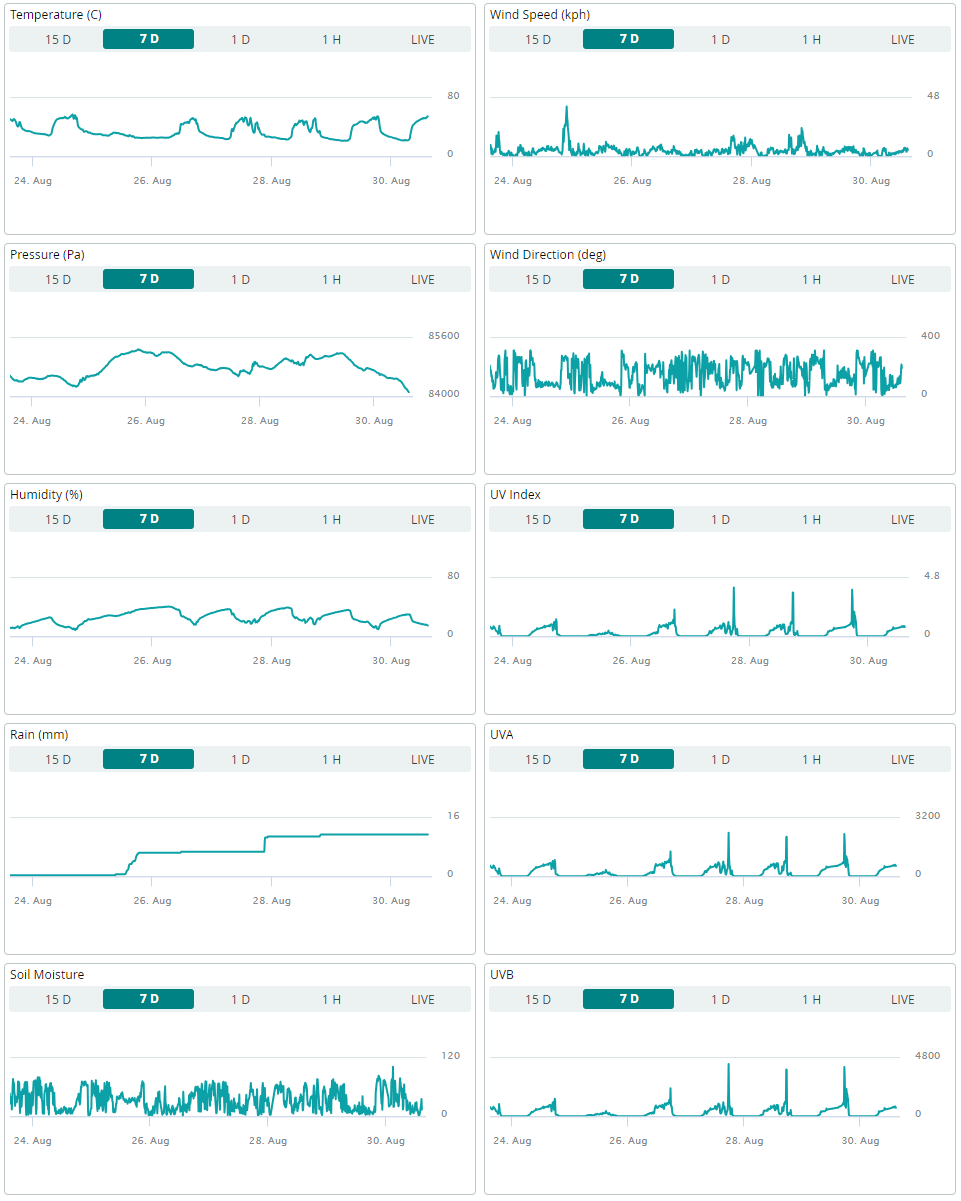
We additionally created a separate dashboard to show historic information from the final week (earlier 7 days). (Click on to enlarge)
Notice: Presently, you can’t publicly share a reside view of your dashboard. Nevertheless, the Arduino Cloud platform does permit customers to share their dashboard on to different customers (by way of electronic mail hyperlink).