

Isometric illustrations—two-dimensional figures that seem three-dimensional—add depth and emphasis to app and internet graphics, bettering person expertise and engagement. For instance, isometric spot icons, which are typically bigger than interface icons, can be utilized to emphasise microcopy and calls to motion. Different isometric photos, equivalent to infographics, diagrams, and product renderings, provide readability when customers want detailed product data or a hen’s-eye view of a course of. As an illustration, a automotive producer’s web site may show an exploded isometric rendering to showcase the precision engineering of its components, or an actual property firm may present an isometric illustration to focus on essential milestones for potential homebuyers.
Isometric illustrations will be difficult and time-intensive to provide. Nevertheless, I’ve spent a number of years creating isometric vector illustrations for purchasers and have found a faster method to make them. On this isometric illustration tutorial for UI designers, I clarify how you can use Adobe Illustrator’s 3D Revolve impact to create isometric objects in six easy steps.
How you can Create an Isometric Illustration in Adobe Illustrator
In Adobe Illustrator, you may rapidly create isometric illustrations utilizing the device’s 3D results. On this tutorial, we’ll make a easy isometric drawing of a bottle and label utilizing the Revolve impact, however these insights additionally apply to Illustrator’s different 3D results like Extrude and Bevel.
Step 1: Draw the Bottle and Liquid
Create a brand new Adobe Illustrator doc, and add a picture reference of a bottle to the doc. Draw an overview of the bottle and the liquid inside. Cut up the bottle and liquid in half. The stroke thickness of the bottle’s contour will outline the glass thickness.
Professional tip: Copy and paste the art work outdoors the artboard as a backup.

Step 2: Apply the Revolve Impact
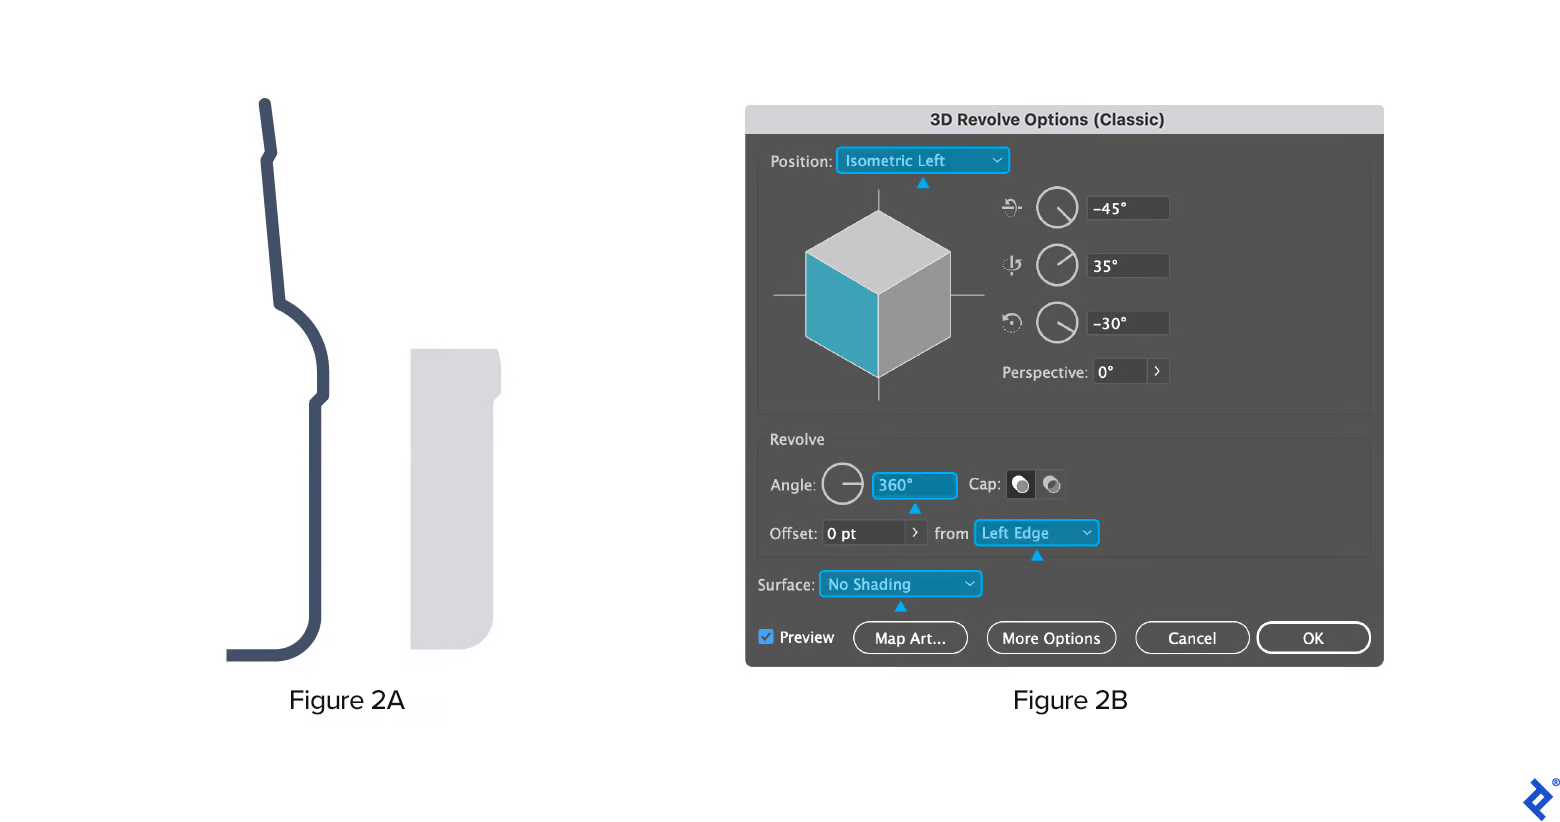
As its title suggests, the Revolve impact turns the trail in a round course round its international y-axis (revolve axis) to create a 3D object. In Adobe Illustrator, the place of the Revolve axis is fastened vertically. (This is the reason we outlined the bottle and cut up it in half.)
Professional tip: Don’t use gradients as fill colours for both the bottle define or the liquid object. You’ll have an opportunity so as to add gradients, highlights, and different visible results on the finish of the tutorial.
To search out the Revolve impact, go to Impact > 3D and Supplies > 3D (Classics) > Revolve (Basic). On the prime of the dialog window, you’ll see a subject labeled Place. Select Isometric Left. Beneath Revolve, tweak the next revolve and floor shading choices:
- Angle: This defines the diploma of rotation across the object’s axis. If set to 180°, the bottle will likely be cut up in half vertically. Set the angle to 360° to create a whole bottle.
- Offset: This controls the offset distance from the thing’s vertical axis. Enter 0.
- Floor: This units the thing’s materials and lighting properties. Select No Shading.
You will have created an isometric bottle with liquid. Now it’s time so as to add labels.
Professional tip: You might be tempted to use the Increase Look impact at this level, however don’t try this till we create the labels.

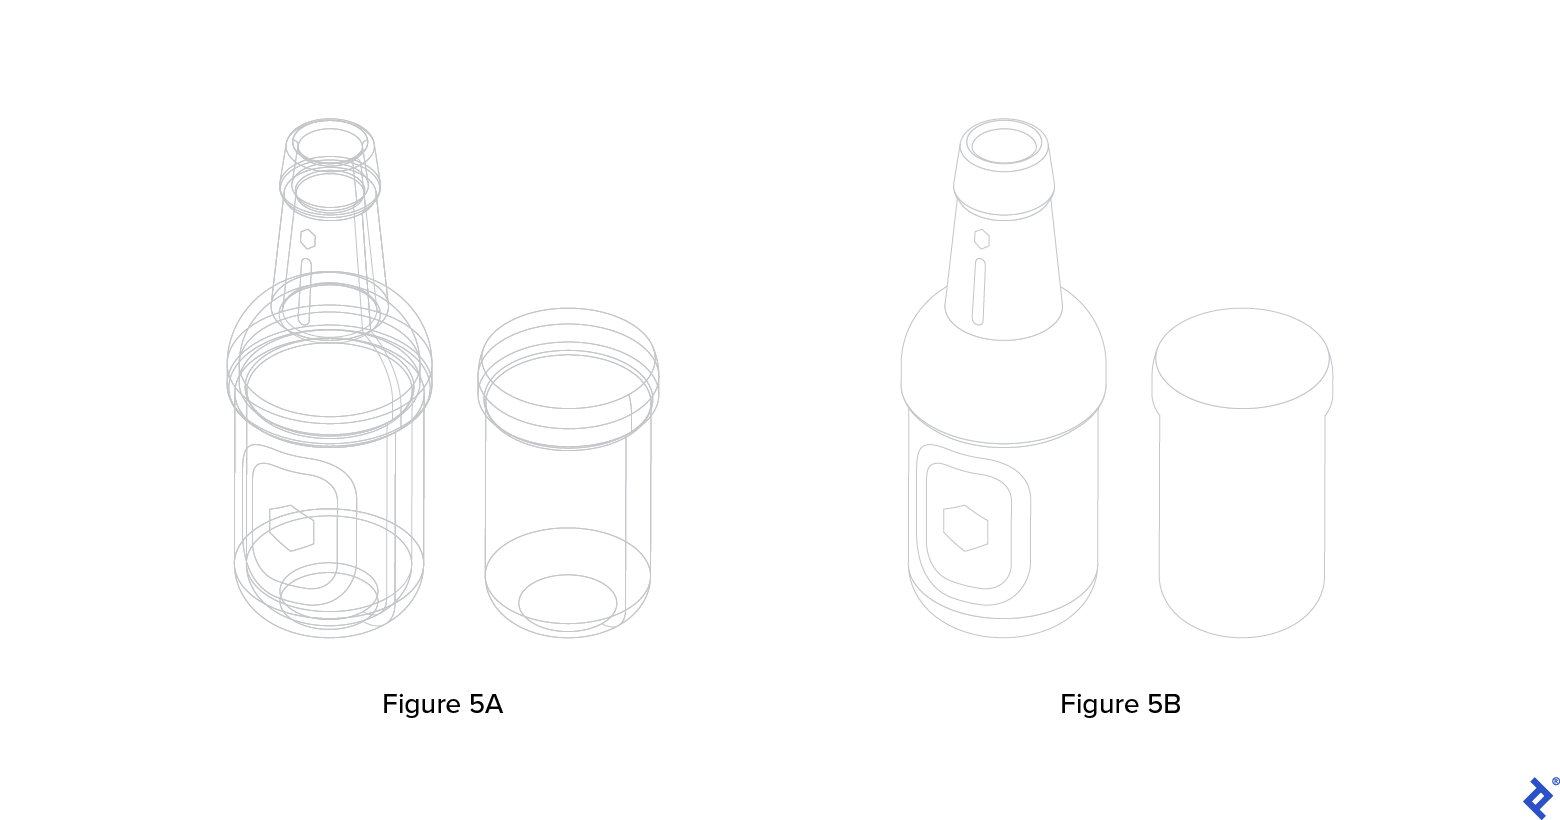
Step 3: Put together the Bottle Label
Use the bottle to outline the label dimensions. Within the instance picture under, the peak of the physique label is clear, however the top of the neck label isn’t clear as a result of the floor isn’t parallel to the axis. An approximate top will suffice. The label size is calculated utilizing the circle circumference formulation 2πr.
If you’re completely happy along with your label design, convert each labels to symbols. The Symbols panel is discovered beneath Window > Symbols. Individually drag and drop the label designs into the panel to create symbols.
Professional tip: Symbols in Adobe Illustrator and Sketch work equally.

Step 4: Map the Label Onto the Bottle
So long as the bottle hasn’t been vectorized utilizing the Increase Look impact, it’s absolutely editable. Choose the bottle after which navigate to Window > Look > 3D Revolve.
To map the label design to the bottle, click on the Map Artwork possibility on the backside left of the 3D Revolve panel. This may help you choose and regulate the image for the bottle. Ensure to match the image to the proper floor. Click on Scale to Match, and the label will map to the bottle.
Observe the identical steps for the neck label.

Step 5: Clear Up the File
Now it’s time to use Bezier curves—utilized in pc graphics to provide steady curves which seem easy in any respect scales—to your bottle. Choose Object > Increase Look.
Increasing an object’s look creates a grouped assortment of minor components that give the phantasm of a 3D object. Mix the weather with both the Pathfinder or Form Builder instruments to maintain issues tidy.
Becoming a member of objects will create undesirable anchor factors. Cut back them by choosing Object > Path > Simplify. In case you use Illustrator recurrently, obtain the VectorScribe plugin and use its Delete Anchor Level device to excellent this step.
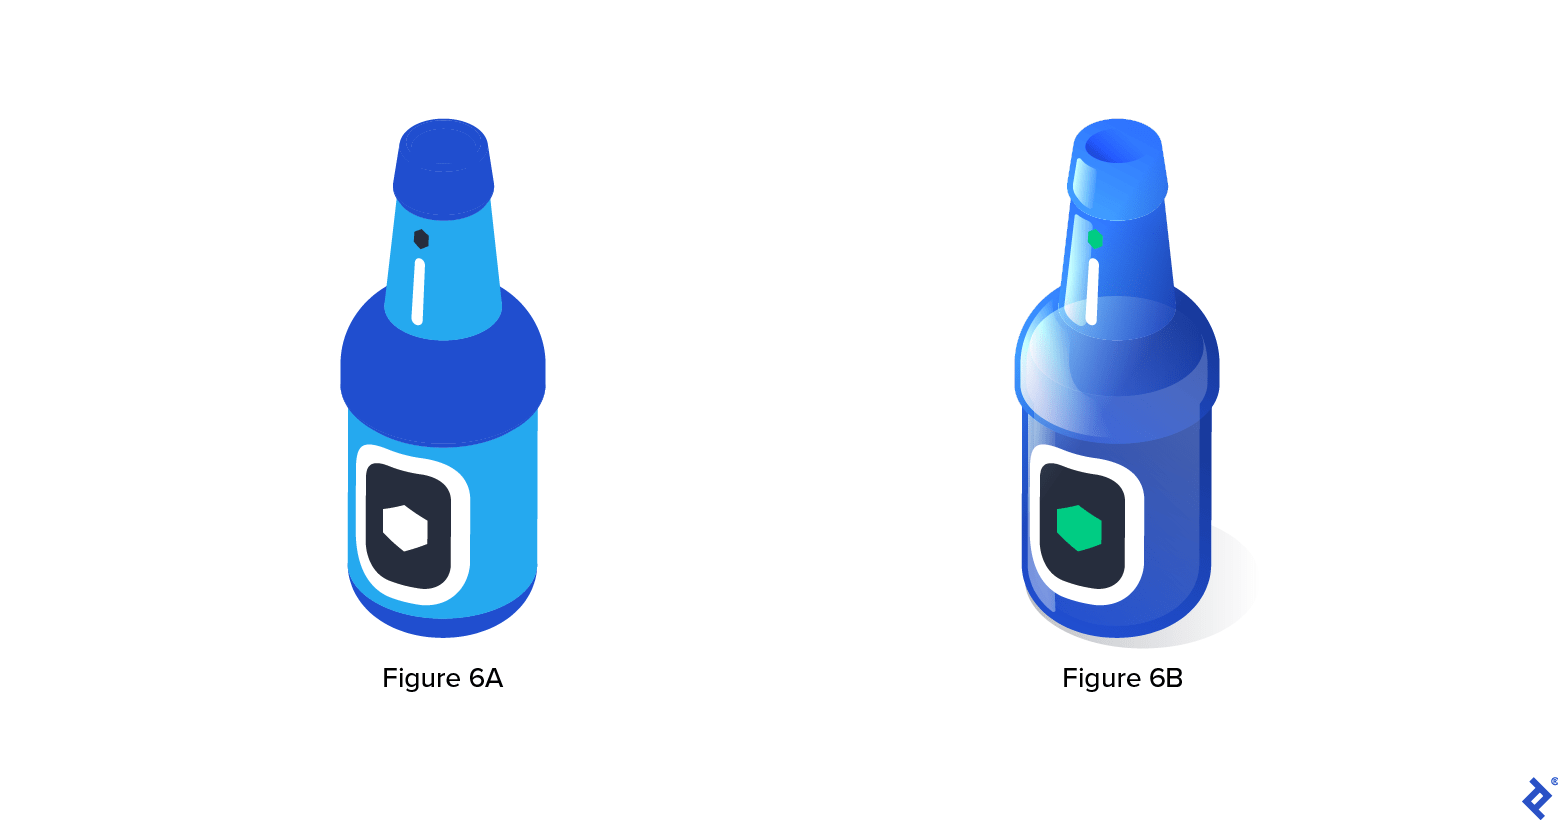
Step 6: Refine Your Illustration With Colours and Gradients
When you’ve created your isometric illustration, chances are you’ll wish to add colours and gradients to assist convey the bottle to life. Add reflections, highlights, and shadows (organized in separate layers) for a practical look, or use strokes and a simplified coloration palette for a extra graphic vibe. In case you’re not sure the place to start, discover totally different coloration combos with Illustrator’s palette generator. With a strong isometric illustration basis, the design potentialities are limitless.
Examples of Isometric Illustrations in UI Design
Now that you’ve got a quick and simple method to create isometric illustrations, check out some examples from three Toptal different designers to get your artistic juices flowing.
Digital Convention Brochure
Štefan Kováč is a template designer for the Adobe Inventory market. This instance is a digital convention brochure template he created utilizing easy strokes, shapes, textual content frames, and monochromatic gradients. To compose these drawings, Štefan used InDesign’s Rotation +/- 30° and Skew +/-30° results to realize isometric distortion.

Digital Workplace Information
Paulina Jozwik used isometric illustrations to create a digital office-space information for Teal Area. She selected this system resulting from its prevalence in architectural drawings and since she felt that the three-dimensional nature of isometric photos would assist her renderings stand out on Teal Area’s web site, which primarily employs flat design components.

Instagram Marketing campaign
To rejoice the fiftieth Nationwide Day of Oman, Wafa’ Babasail was commissioned to create a singular Instagram marketing campaign for Asyad Group, a logistics firm within the Center East. Wafa’ used isometric illustration strategies and exaggerated scale relationships to design a map exhibiting the corporate’s widespread impression on Oman’s seaports.

Deliver Your UI Designs to Life With Isometric Illustrations
Isometric illustrations assist designers convey depth, dimension, and character to their UI design tasks. Historically, creating isometric illustrations has been a time-consuming job, but it surely doesn’t should be. Whether or not you’re engaged on a map, product rendering, or infographic, isometric drawing is an effective way so as to add richness and perspective to internet and cellular illustrations.
By following the quick and simple methodology outlined on this tutorial, you may create beautiful isometric art work very quickly.