

MapKit is a strong framework that permits builders so as to add maps, annotations, and location-based options to their iOS purposes. With SwiftUI, you may simply combine MapKit into your app and create interactive and dynamic maps that supply an incredible consumer expertise. On this tutorial, we’ll discover find out how to work with maps and annotations in SwiftUI, and find out how to customise the map type and digicam place.
The MapKit Fundamentals
Let’s begin with the fundamentals of MapKit. The MapKit framework features a Map view that builders can use to embed a map in any SwiftUI venture. Right here is an instance:
|
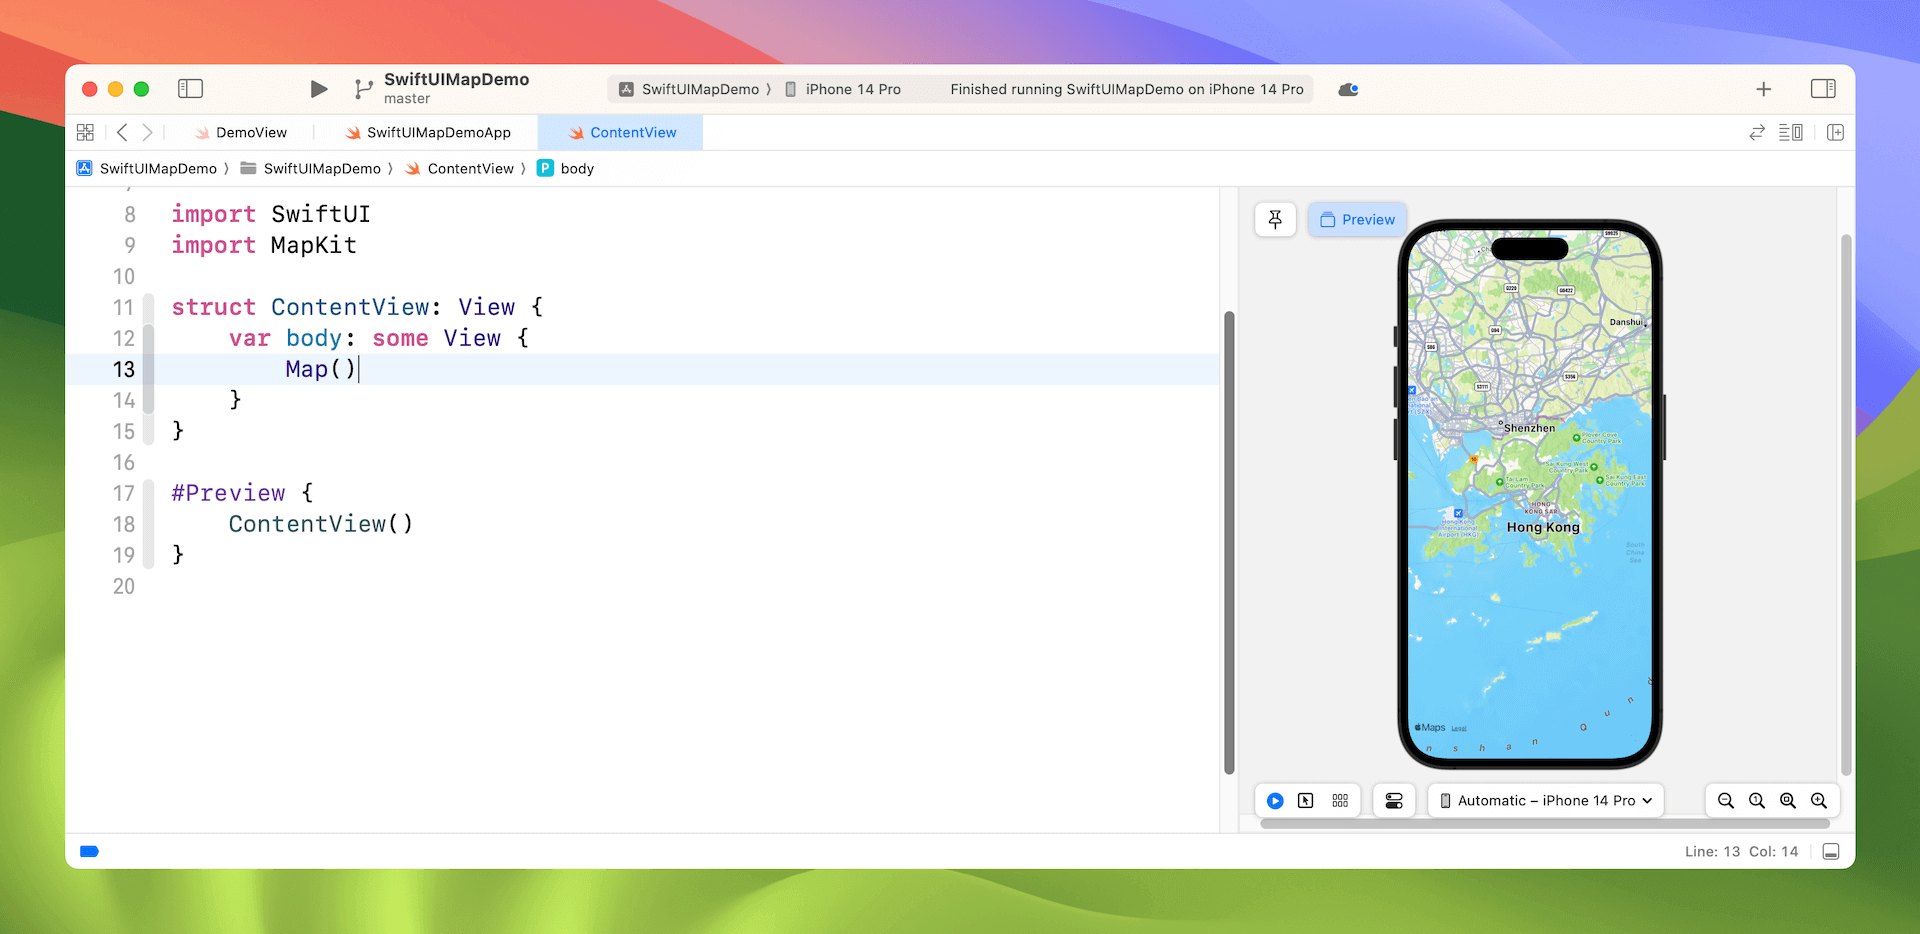
import SwiftUI import MapKit
struct ContentView: View { var physique: some View { Map() } } |
Earlier than utilizing the Map view, it’s a must to import the MapKit framework. Then, to create a map, merely instantiate a Map view. In case you’ve opened the Preview canvas in Xcode, you must see a full display map within the simulator.
Altering the Preliminary Place with Map Digital camera
As a substitute of displaying a default location, the Map view has one other init technique so that you can change the preliminary place of the map:
|
init( initialPosition: MapCameraPosition, bounds: MapCameraBounds? = nil, interactionModes: MapInteractionModes = .all, scope: Namespace.ID? = nil ) the place Content material == MapContentView<By no means, EmptyMapContent> |
You possibly can an occasion of MapCameraPosition because the preliminary place of the map. MapCameraPosition accommodates varied properties that you should utilize to regulate which place or area is displayed, together with:
automatedmerchandise(MKMapItem)– for displaying a selected map merchandise.area(MKCoordinateRegion)– for displaying a selected area.rect(MKMapRect)– for displaying particular map boundaries.digicam(MapCamera)– for displaying an current digicam place.userLocation()– for displaying the consumer’s location
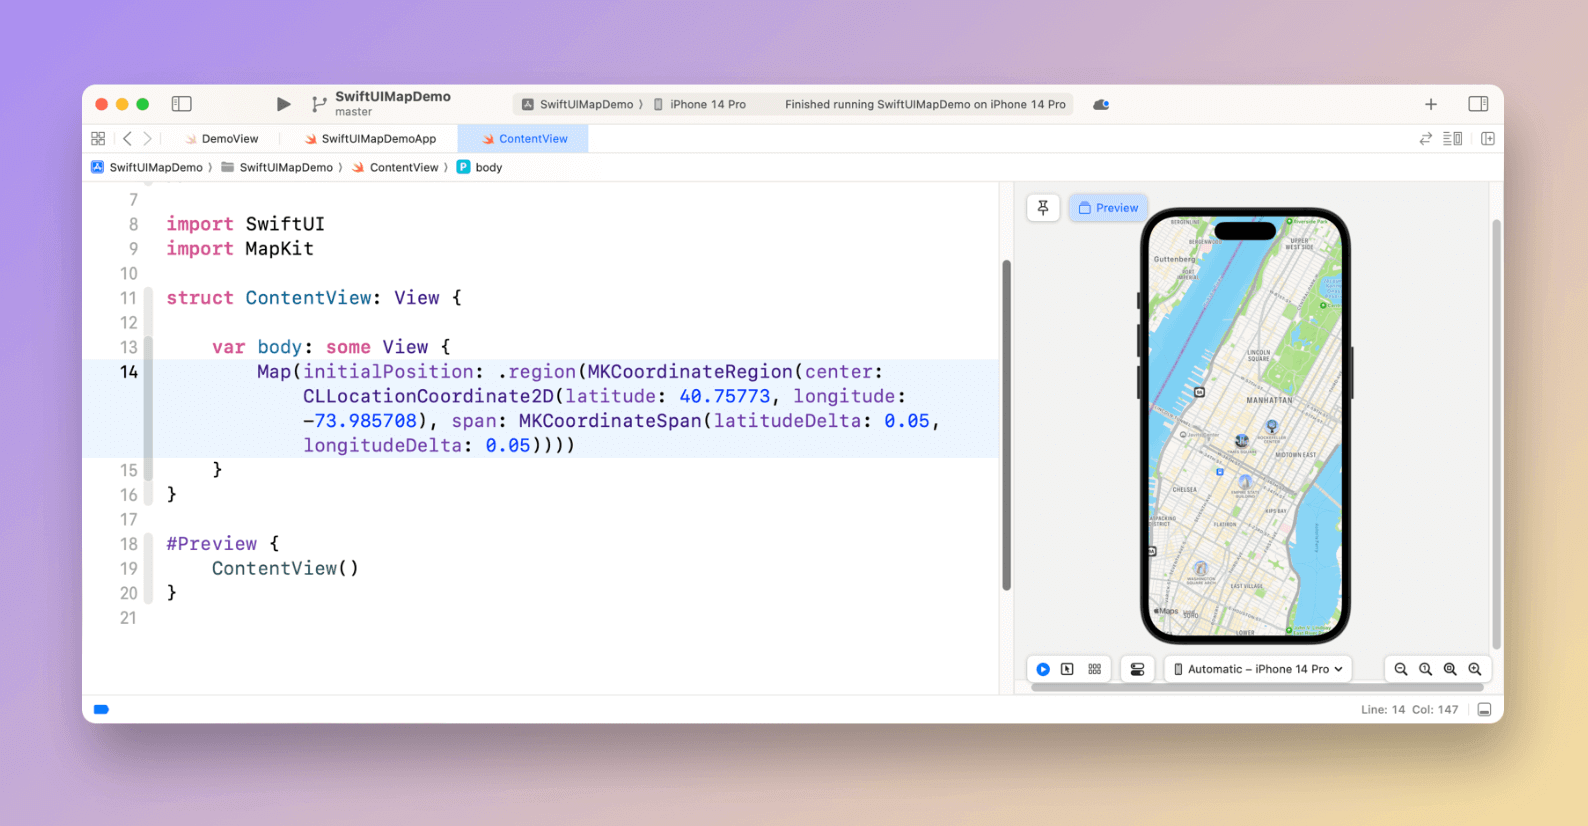
For example, you may instruct the map to show a selected area through the use of .area(MKCoordinateRegion):
|
Map(initialPosition: .area(MKCoordinateRegion(middle: CLLocationCoordinate2D(latitude: 40.75773, longitude: –73.985708), span: MKCoordinateSpan(latitudeDelta: 0.05, longitudeDelta: 0.05)))) |
The coordinates within the above pattern is the GPS coordinates of Occasions Sq. in New York. The worth of span is used to outline your required zoom stage of the map. The smaller the worth, the upper is the zoom stage.
If in case you have a selected location for show, you may move a map merchandise because the preliminary place. Here’s a pattern code snippet:
|
extension CLLocationCoordinate2D { static let bigBen = CLLocationCoordinate2D(latitude: 51.500685, longitude: –0.124570) }
struct ContentView: View {
var physique: some View { Map(initialPosition: .merchandise(MKMapItem(placemark: .init(coordinate: .bigBen)))) } } |
Animating the Change of Map Place
The Map view additionally offers an extra init technique that accepts a binding to MapCameraPosition. If you might want to change the place of the map, this init technique is extra acceptable:
|
@State non-public var place: MapCameraPosition = .automated
Map(place: $place) { . . . } |
For instance, if you wish to add two buttons for customers to modify between two places, you may write the code like this:
|
1 2 3 4 5 6 7 8 9 10 11 12 13 14 15 16 17 18 19 20 21 22 23 24 25 26 27 28 29 30 31 32 33 34 35 36 37 38 39 |
extension CLLocationCoordinate2D { static let bigBen = CLLocationCoordinate2D(latitude: 51.500685, longitude: –0.124570) static let towerBridge = CLLocationCoordinate2D(latitude: 51.505507, longitude: –0.075402) }
struct ContentView: View {
@State non-public var place: MapCameraPosition = .automated
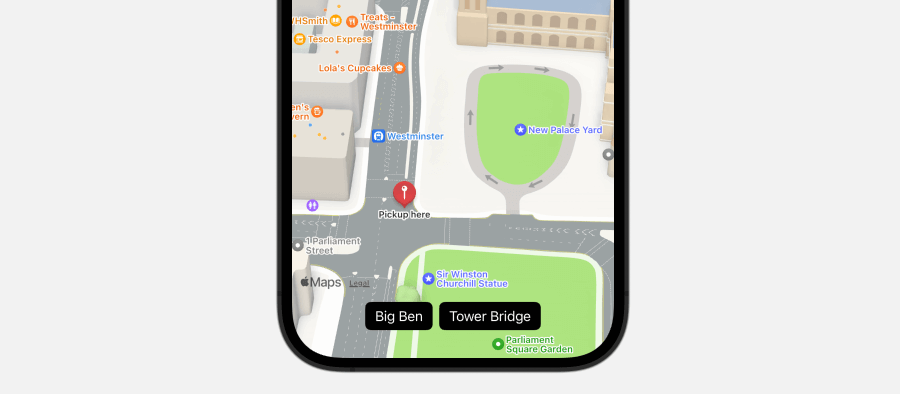
var physique: some View { Map(place: $place) .onAppear { place = .merchandise(MKMapItem(placemark: .init(coordinate: .bigBen))) } .safeAreaInset(edge: .backside) { HStack { Button(motion: { withAnimation { place = .merchandise(MKMapItem(placemark: .init(coordinate: .bigBen))) } }) { Textual content(“Large Ben”) } .tint(.black) .buttonStyle(.borderedProminent)
Button(motion: { withAnimation { place = .merchandise(MKMapItem(placemark: .init(coordinate: .towerBridge))) } }) { Textual content(“Tower Bridge”) } .tint(.black) .buttonStyle(.borderedProminent) } } } } |
By wrapping the place variable with withAnimation, the map view will mechanically animate the place change.
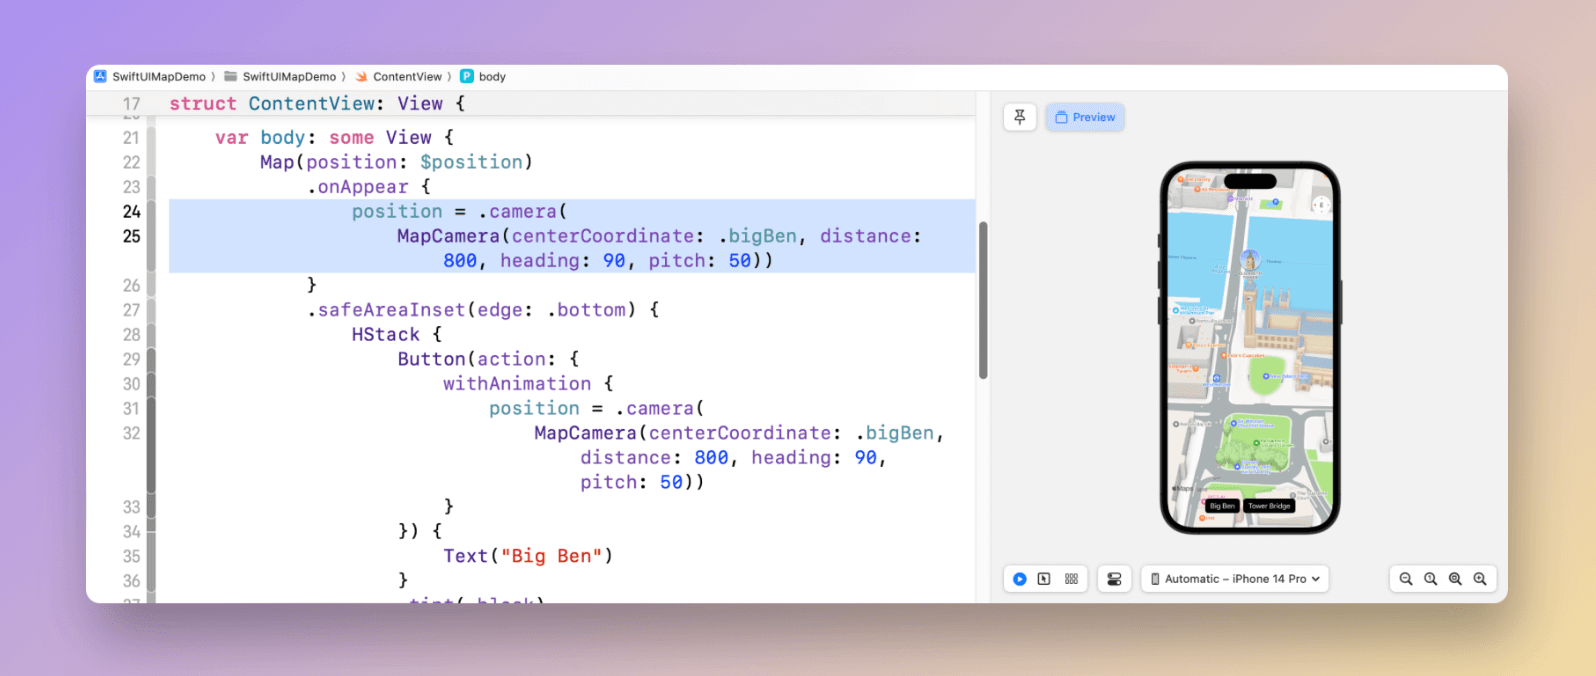
This animation works even higher once you present a MapCamera with a pitch angle to create a 3D perspective. To see what occurs, you may attempt altering the place of Large Ben within the following line of code:
|
place = .digicam(MapCamera( centerCoordinate: .bigBen, distance: 800, heading: 90, pitch: 50)) |
If you preview the map view, the digicam angle adjusts to indicate a 3D perspective of the area.
Including Markers and Annotations
Markers are a helpful function in MapKit that will let you show content material at a selected coordinate on the map. It provides an additional layer of knowledge to your map, equivalent to a retailer or a restaurant. Markers will be personalized with a system picture and tint colour, making them visually distinct and simple to acknowledge. Whether or not you’re constructing a navigation app or a journey information, markers are a priceless device that may enable you to create a greater consumer expertise.
So as to add a marker, you may create the Marker view within the map content material builder closure like this:
|
Map(place: $place) { Marker(“Pickup right here”, coordinate: .pickupLocation) } |
Optionally, you may customise the Marker object with a system picture. To vary the colour of the marker, use the tint modifier:
|
Marker(“Pickup right here”, systemImage: “automotive.entrance.waves.up”, coordinate: .pickupLocation) .tint(.purple) |
Along with Marker, SwiftUI now contains an Annotation view in iOS 17 for indicating a location on a map. It capabilities equally to Marker, however affords better flexibility for personalization.
So as to add an annotation, you create an Annotation view within the map content material closure. Here’s a pattern code snippet for including a easy annotation:
|
Map(place: $place) { Annotation(“Choose up”, coordinate: .pickupLocation, anchor: .backside) { Picture(systemName: “automotive.entrance.waves.up”) } } |
You may have the flexibleness to customise the annotation in quite a lot of methods. By attaching completely different modifiers to it, you may change its look and habits. Moreover, you should utilize stack views to rearrange the completely different parts of the annotation and create a format that fits your wants. Right here is an instance:
|
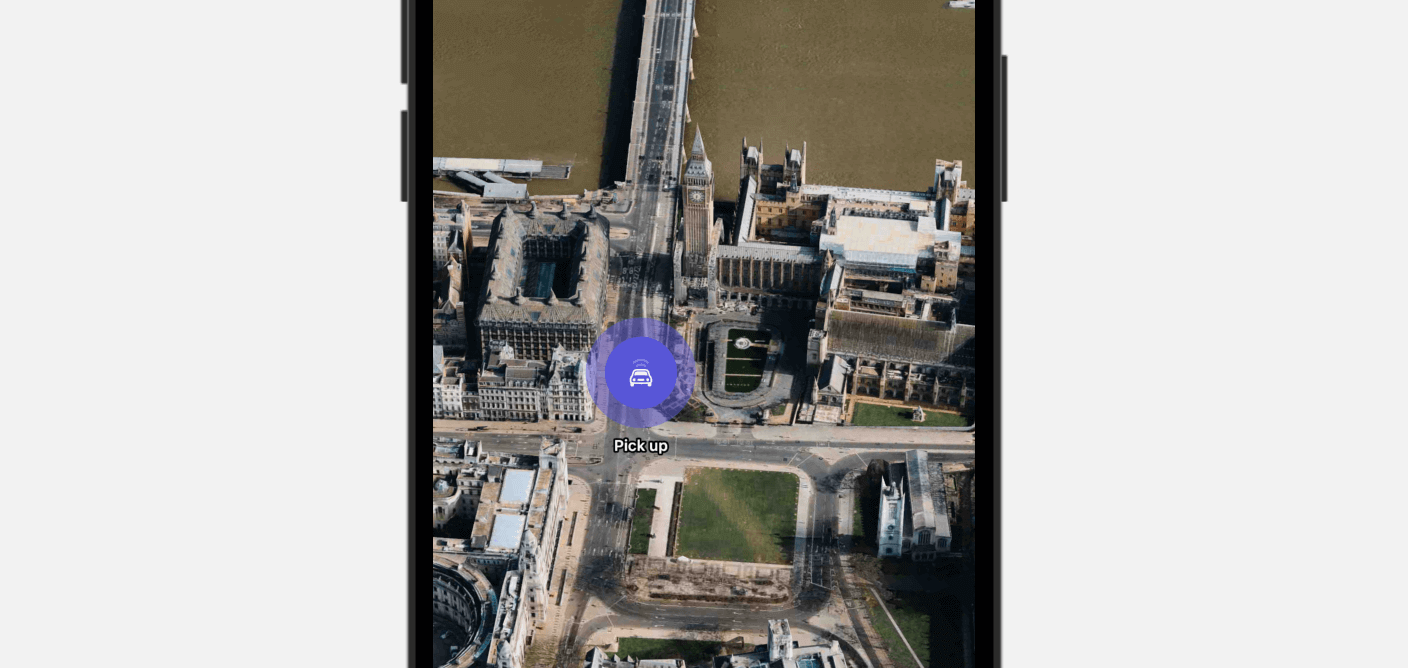
Annotation(“Choose up”, coordinate: .pickupLocation, anchor: .backside) { ZStack { Circle() .foregroundStyle(.indigo.opacity(0.5)) .body(width: 80, top: 80)
Picture(systemName: “automotive.entrance.waves.up”) .symbolEffect(.variableColor) .padding() .foregroundStyle(.white) .background(Shade.indigo) .clipShape(Circle()) } } |
This outcomes an animated annotation as proven within the beneath illustration.
Altering the Map Type
By default, the map view renders the map in a regular type. Nonetheless, you may change the type through the use of the mapStyle modifier:
|
Map {
} .mapStyle(.imagery(elevation: .sensible)) |
This creates a map type primarily based on satellite tv for pc imagery. By specifying a sensible elevation, the map view renders a 3D map with a sensible look.
Optionally, you can even change the map type to hybrid like this:
Abstract
This tutorial covers find out how to work with maps and annotations in SwiftUI, utilizing the MapKit framework. The most recent model of SwiftUI affords extra APIs and views for builders to additional customise the map view. By now, you must know find out how to embed a map in your app and add an annotation to spotlight a location on the map.
If you wish to be taught extra about SwiftUI, don’t neglect to take a look at our Mastering SwiftUI e-book.