
Led strips are a preferred lighting resolution for quite a lot of utility like enhancing atmosphere of room, present further lighting in pictures and do eye-catching lighting in festivals. The led strip we’re utilizing in our venture is WS2812B. It’s a programable led strip utilizing which we are able to create our personal patterns, coloration mixtures, and led animations. All we want is a microcontroller to program it. On this venture we’re utilizing Raspberry pi pico to program led strip.
By making the programmed led sample react to beat of music we add further curiosity to the venture. To detect sound we’re utilizing a microphone module. The mic module will be positioned close to any sound supply. The led animations will begin on the beat of sound. It will make the led lights extra interactive.
{Hardware}
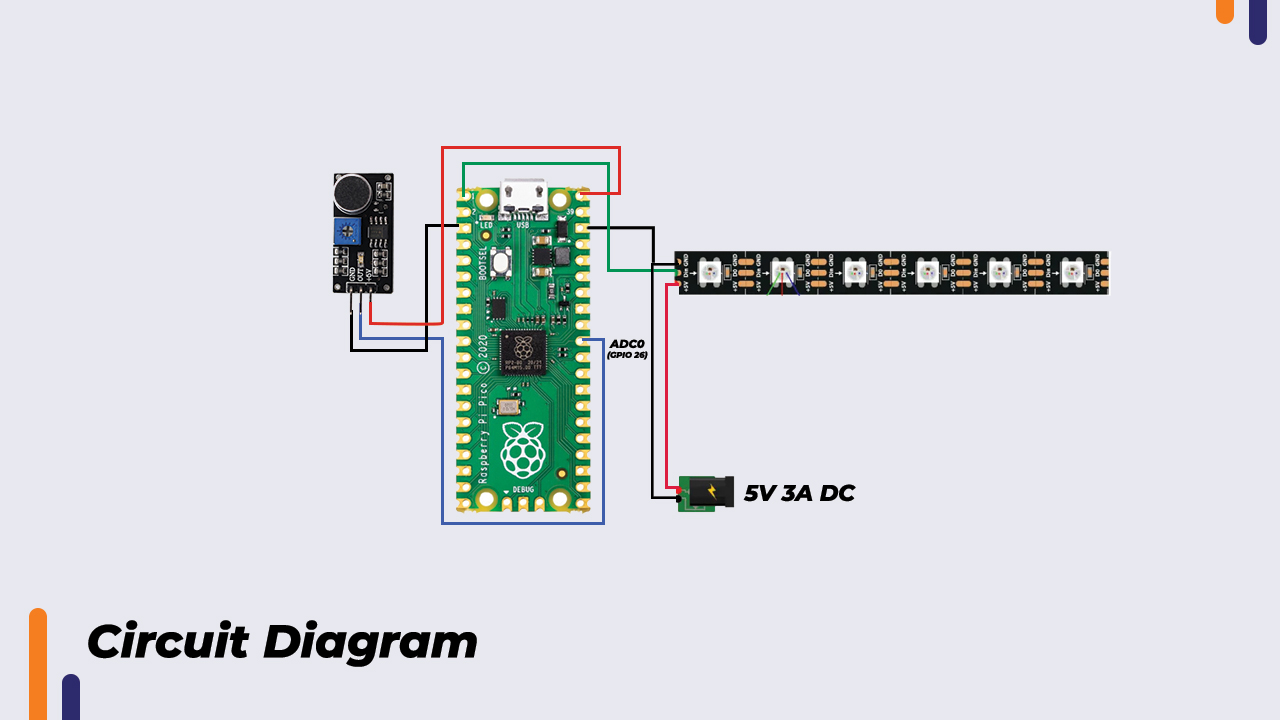
To make this venture you’ll require the under given parts. Collect the parts and make connections as per the circuit diagram.
Elements
- WS2812B led strip
- Raspberry pi pico
- Micro USB cable
- Adapter 5V 3A
- LM393 sound detection sensor
- Jumper wires (F to F) – 4pcs
Circuit diagram
Library Set up Steps
- Obtain zip folder and extract the zip contents to particular folder.
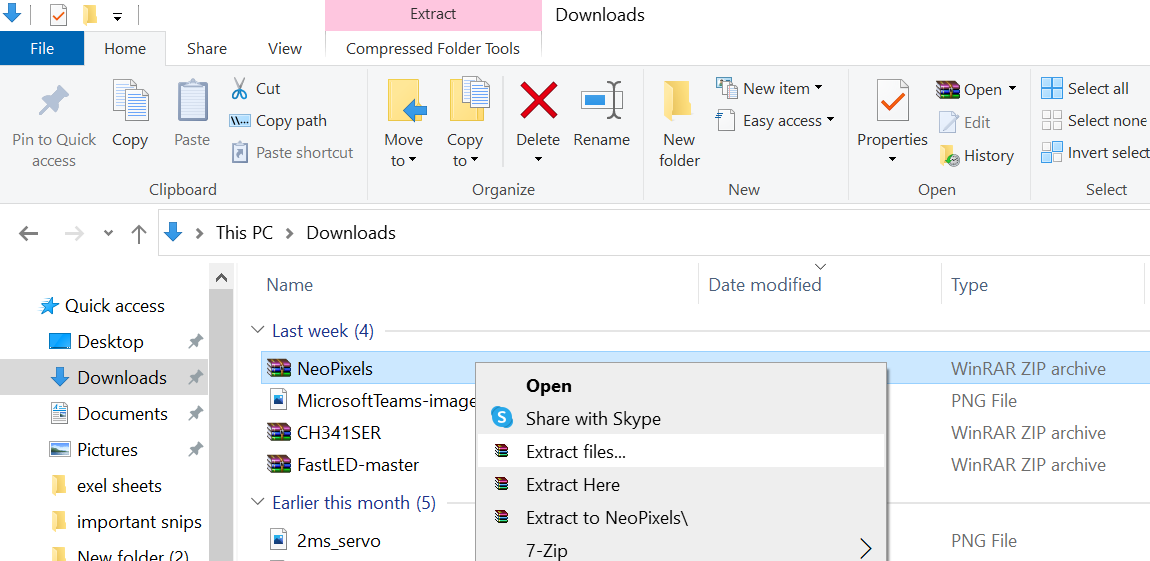
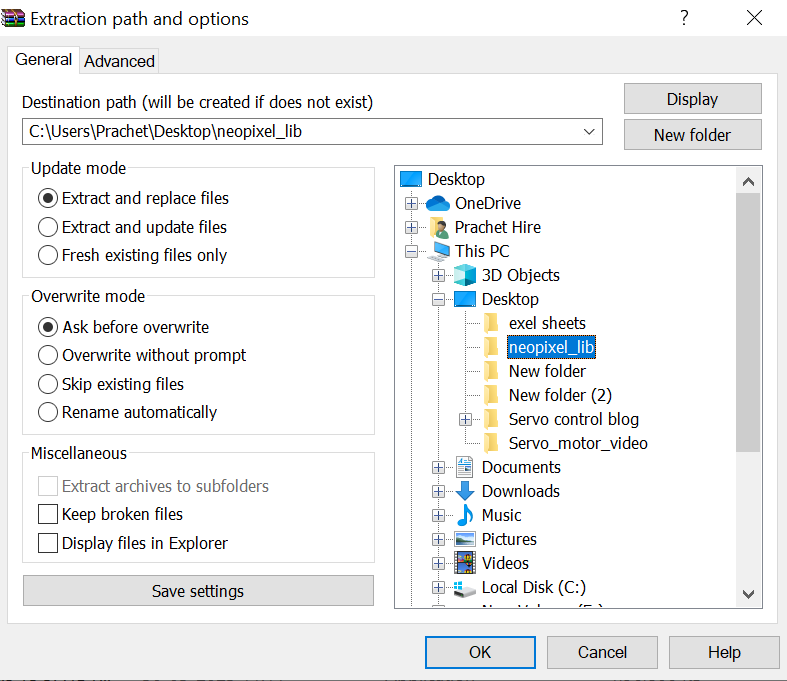
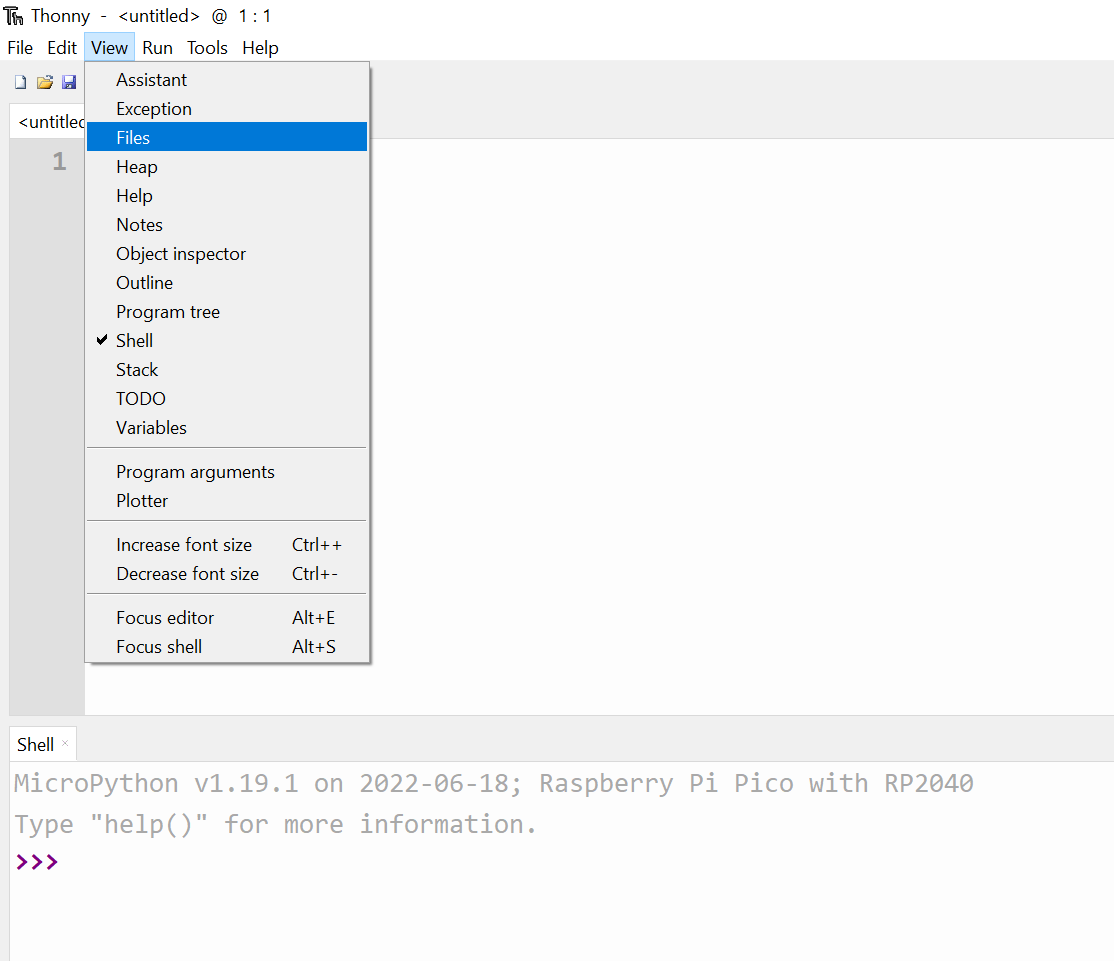
- Open Thonny IDE with Raspberry pi pico linked to COM port. Click on on view after which information.
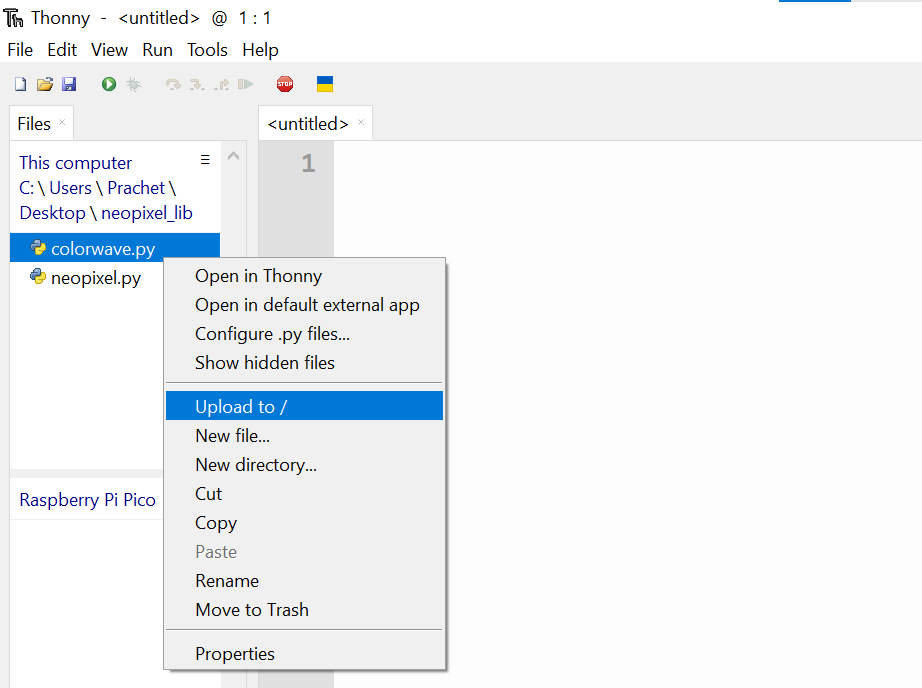
- Click on on “This pc” and browse to path the place you could have extracted the zip folder contents.

- There you will see that two python information “neopixel.py” and “colorwave.py”. Add each the information to raspberry pi pico.
The neopixel library is now put in.
Tips on how to use the library?
After importing the library we have now to create a object from the “Neopixel” class and provides it a reputation for eg – pix. The Neopixel class takes 4 arguments. First is the variety of led’s in strip then the machine state quantity which is sort of a distinctive ID for our led strip after which the colour scheme which is “GRB” – Inexperienced, Crimson, Blue.
pix = Neopixel(Variety of led in strip(60), machine state quantity(0), Colour scheme (“GRB”))
As soon as the article “pix” is created. Let’s see the completely different features of the category.
- brightness(quantity) – This units brightness of the led strip. When quantity is “0” it’s minimal brightness and when quantity is 255 it’s most brightness
- present() – When this operate known as it updates the adjustments made and the result’s seen on the led strip.
- fill(RGB tuple) – This operate fills all of the led’s within the strip with the RGB coloration tuple handed within the argument. The tuple comprises RGB values enclosed in two spherical brackets the place 255 is most and 0 is minimal, for eg-(255,100,0) , on this the purple is most (255) , inexperienced is medium (100) and blue is none (0). This tuple will create a yellow coloration.
- set_pixel_line(decrease led quantity, larger led quantity, RGB coloration tuple ) – This operate is used to mild a set of leds in led strip for eg- solely final ten leds from 49th led to 59th led. So the decrease led quantity might be 49 and better led quantity might be 59. The final argument is the RGB coloration tuple which units the colour.
- set_line_gradient(decrease led quantity, larger led quantity, RGB coloration tuple, RGB coloration tuple) – This operate is much like the “set_pixel_line” operate however it takes two coloration arguments and that’s as a result of it creates a gradient impact this implies that there’s a clean transition between the 2 colours from decrease led to larger led.
As soon as we all know use the above features in our code we are able to create our personal customized led designs with customized colours.
Sound reactive fading led
Let’s program fading led impact and make it sound reactive.
Checking the sound sensor
To make the ws led strip react to sound we should learn the ADC pin 26 on which our mic module is linked. The studying should occur repeatedly so the studying should occur throughout the whereas loop. The ADC worth have to be printed to the shell for us to see the actual time adjustments within the ADC worth when sound is made. So in accordance with the remark the ADC worth falls under 65535 when sound was made. This offers us the situation for our “if” assertion in program.
Code
<!– wp:code –>
<pre class=”wp-block-code”><code>from machine import Pin, ADC
from neopixel import Neopixel
import time
mic = ADC(Pin(26))
pix = Neopixel(60,0,0,”GRB”)
c=0
color_dict = {0:(255,100,0), 1:(255,50,0), 2:(0,255,0), 3:(0,0,255), 4:(255,0,0),
5:(0,255,100), 6:(255,255,255)}
whereas True:
mic_val = mic.read_u16()
print(mic_val)
if(mic_val<65535):
c+=1
for a in vary(255,0,-10):
pix.brightness(a)
pix.fill(color_dict[c%7])
pix.present()
time.sleep_ms(1)</code></pre>
<!– /wp:code —
Code clarification
When the sound is detected the rely variable “c” is incremented by 1 and a “for loop“ is triggered which works from most 255 to minimal 0 in steps of 10. The “for loop” variable units the brightness of the led strip and due to this fact the brightness additionally varies from most to minimal giving us a fading impact.
The rely variable is used to pick the colour from the dictionary (“color_dict”).
We use (cpercent7) mod seven as a result of we don’t need the rely to exceed above six as we have now solely seven colours in our dictionary. The mod operate confines the rely variable to a spread of zero to 6.
Lastly we replace the adjustments by calling the present() operate and look ahead to 1ms. We will enhance the velocity both by decreasing the delay or by rising the step measurement.
Sound reactive operating led (capturing star impact) –
Let’s program operating led impact and make it sound reactive.
To create a operating led impact we should use the “set_pixel_line” operate together with “for loop” as we have now to animate that line with a purpose to create a flowing impact.
Code –
<!– wp:code –>
<pre class=”wp-block-code”><code>from machine import Pin, ADC
from neopixel import Neopixel
import time
import random
mic = ADC(Pin(26))
c=0
numpix = 60
pix = Neopixel(numpix, 0, 0, “GRB”)
color_dict = {0:(255,100,0), 1:(255,50,0), 2:(0,255,0), 3:(0,0,255), 4:(255,0,0),
5:(0,255,100), 6:(255,255,255)}
black = (0,0,0)
s = 4
whereas True:
pix.brightness(255)
mic_val = mic.read_u16()
print(mic_val)
if(mic_val < 65535):
c+=1
pix.fill(color_dict[c%7])
time.sleep_ms(10)
for i in vary(0,59-s,s):
pix.set_pixel_line(i,i+5,color_dict[c%7])
pix.present()
time.sleep_ms(1)
pix.fill(black)
pix.present()</code></pre>
<!– /wp:code –>
Code clarification
Initially when the sound is detected. The ws led strip flashes with the colour picked up by the rely variable after which the “for loop” is triggered which works from zero to the final led. The step measurement have to be divisible by for loop vary due to this fact we write “59 – s” the place is the step measurement. We will change the step measurement and enhance the velocity.
Each time “i” increments within the “for loop” the “set_pixel_line” activates 5 leds ranging from the primary led which is at place “i”. It retains it on for 1ms after which turns it off by filling black coloration. The “i” variable increments and the subsequent set of 5 leds activates. The cycle repeats and the operating led impact is achieved.
After the for loops iterates via all of the numbers in vary. The pix.present() operate fill the leds with black coloration and that turns off all of the led’s in strip. Able to detect new sound.
Conclusion
This was the venture. On this means we are able to program the WS2812B led strip with Raspberry pi pico and create our personal sound reactive led mild. When you’ve got any doubt relating to any a part of this weblog then be happy to remark it. Our crew might be there to help you.
For extra digital initiatives. Try our YouTube channel